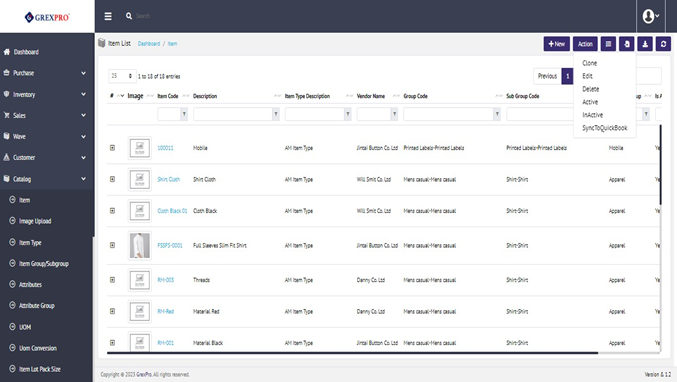
Here, you will find all information related to products available in the warehouse. This list includes directly added products as well as imported products from Apparel Magic.

To add a new item, you need to click the 'New' button, located at the top-right corner of the Item List screen, which will lead you to the following screen:

The process of adding an Item is divided into eight steps:
To add a Product, you need to fill in mandatory fields like Parent Item Code, Product Description, Item type, Unit of Measurement (UOM), Stock Maintenance Rule, and Attribute Group. There are some optional fields as well, such as Group Code, Subgroup Code, and others. Before jumping to the next step using the 'Next' Button, you need to save the details by clicking on the 'Save' Button.

The next step is Grid, where you can define variants of product. You need to select size and colour and click the Add button.
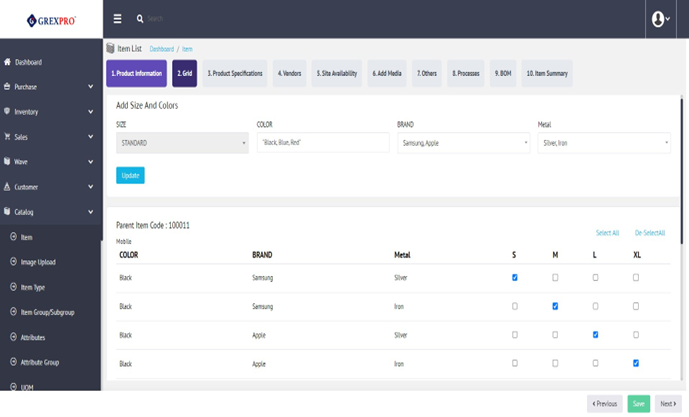
This will generate a grid from selected attributes, where you can select which combinations are available by checking the checkbox. Once done, click on the Save button to move to the next step.
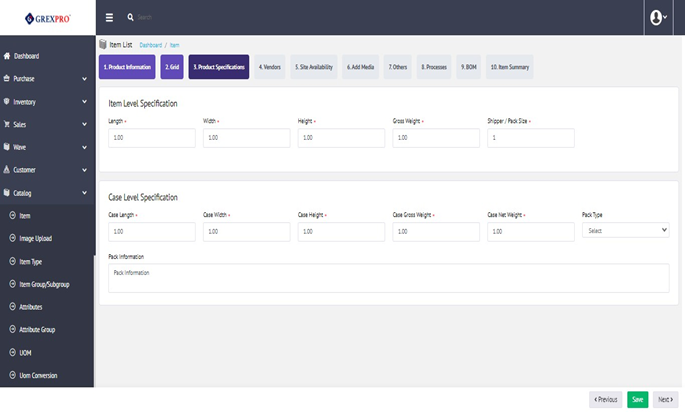
Here, you can define the specifications of the product. Fill in all required details and click on the 'Save' button to move to the next step.
Select a vendor from the dropdown (1), which will open a form where you can edit details. Fill in the required details and click the 'Save' button to move to the next step.

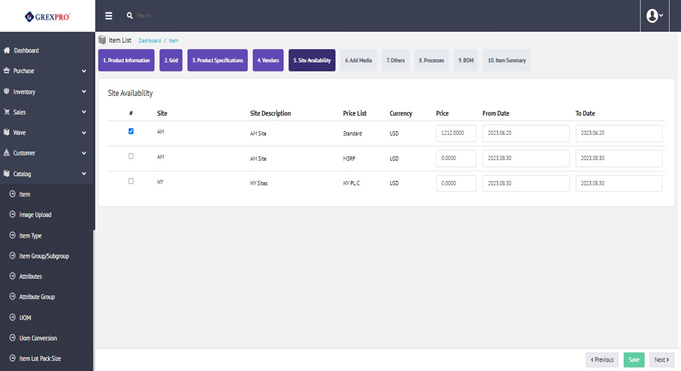
Here, you can select the site and give different prices and dates for each site. Once done, click the 'Save' button located at the bottom-right corner to move to the next step.
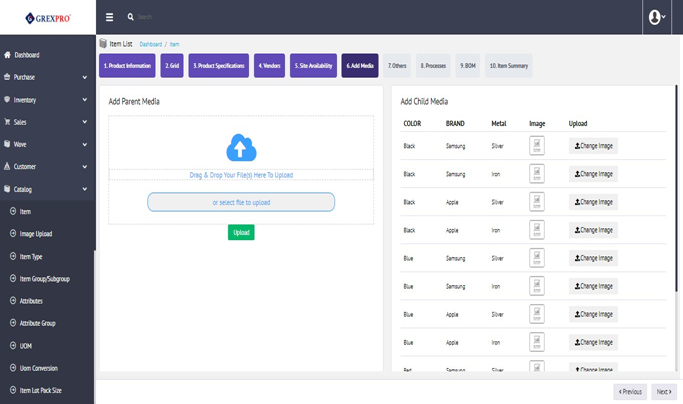
Here, you can upload images for your product. Once done uploading images, click the 'Next' button.
Here, you can add other information such as Season, Brand, and Category. Click on 'Save' to move to the next step.

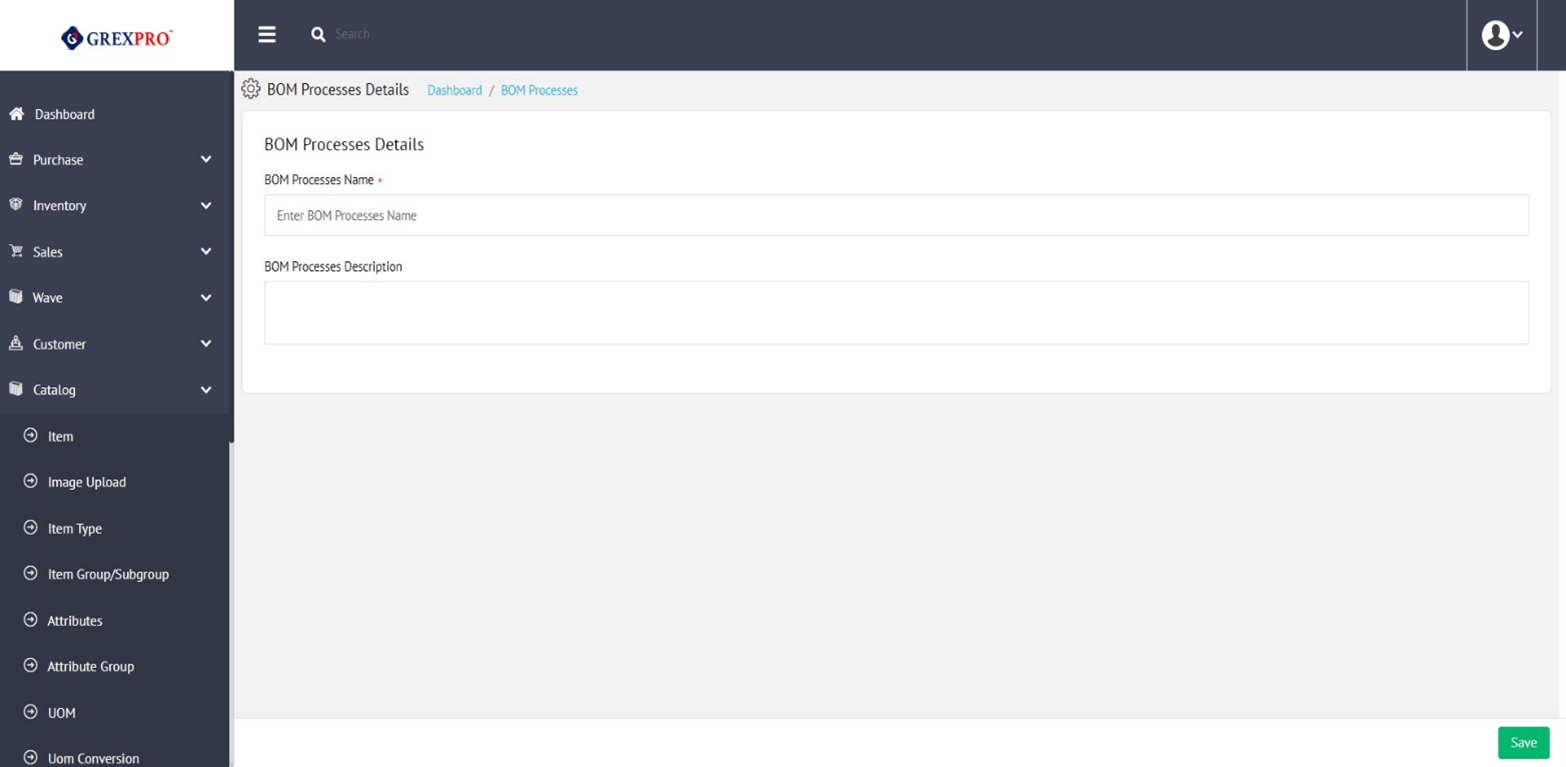
Here, you can add other information, such as BOM Process, and click Add and, mention all the necessary options, and Click on Save to move to the next step.
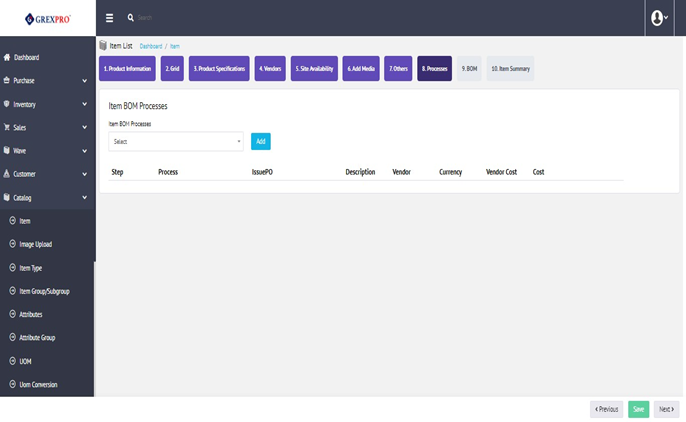
Here, you can add information on the BOM Parent child item, BOM Parent Item, BOM Colour, BOM Child item, and BOM Process and click the Add button. Item details will be shown down fill in them and click the SAVE button.

On the item summary page, you can see information about all the variants of that item. You can also change the Cost, Length, Width, Height, Gross Weight, Lead Time and Status of each variant separately. Click on the Finish button to complete the adding process. Also, you can edit the Barcode Sequence Format, Item Alternative SKU code, and other specifications on the summary page.

Select the entry that you want to clone, click on the Action button on the top-right corner of the screen, and select Clone from the dropdown.
Rest of the process is the same as 7.1.1. Add .
Select the entry which you want to edit, click the Action button on the top-right corner of the screen, and select Edit from the dropdown.
The rest of the process is the same as 7.1.1. Add , however, there are some fields that cannot be changed, such as Parent Item Code, Attribute Group, and Size.
This option is available for an item which is not in use. If the item has been used in SO, PO, or in any other modules of the system, you cannot inactive that item. Select an entry whose status you want to change, click on the Action button on the top-right corner of the screen, and select Active/Inactive from the dropdown.
Simply by clicking on the 'Import' button placed at the bottom centre of the page, you can import details of items from Apparel Magic.
The Export button given at the bottom centre of the screen facilitates you to download a list of visible items.

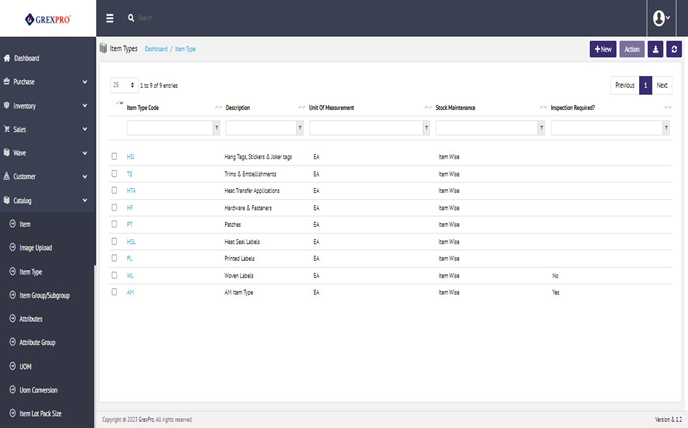
Item Type is the highest level of classifying items into broad categories. Typical examples of item types are "Consumables", "Finished Goods", and "Packing Materials". You can see a list of all item types on the landing page, as shown below:
To add a new item type, you need to click the 'New' button located at the top-right corner of the landing page of the item type, which will lead you to the following page:

To add item type, you need to provide an Item Type Code, Description, Unit of Measurement (UOM), and Stock Maintenance Rule (all are mandatory fields). In order to complete the process of adding a new item type, click on the 'Save' button.
To clone an item type, select it from the list, then click the 'Action' button located at the top-right corner of the screen and select the 'Clone' from the dropdown.
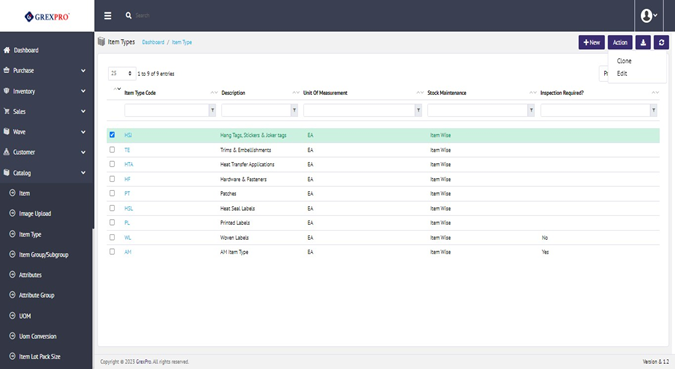
There are two ways to edit an item type. Either click on the Item Type Code or select an item type from the list, then click the 'Action' button located at the top-right corner of the screen and select 'Edit' from the dropdown.
The rest of the process is same as 7.2.1. Add, however, you cannot change the Item Type Code.
The Delete option is only available for entries that are not linked to any other modules of the system. To delete an entry, you need to select an entry and click the 'Action' button located at the top right corner of the screen and click the 'Delete' option from the dropdown.
The Export button given at the bottom centre of the screen facilitates you to download a list of visible item types.
Item Groups and Subgroups are further categorizations of items. While subgroups are contained within item groups, there is no required relationship between groups/subgroups and item types. For instance, "Apparel" can be a group, and "Shirts", and "Dresses" can be its subgroup. You can see a list of all item groups on the landing page:
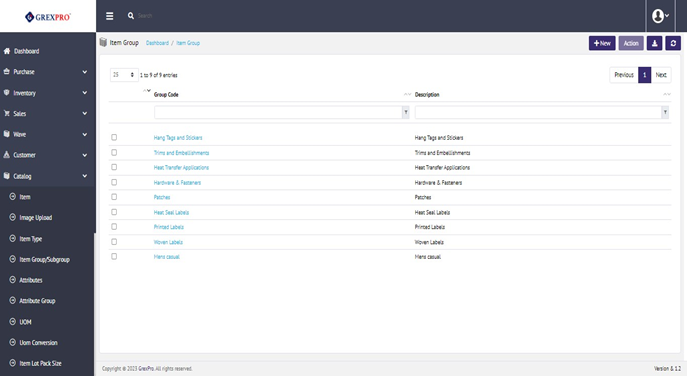
In order to add a new item group, click on the 'New' button located at the top-right corner of the item group's landing page, which will open a pop-up where you can provide the Group code and description about it, followed by clicking on the 'Submit' button.

After creating an item group, it will take you to the page where you can define a subgroup.
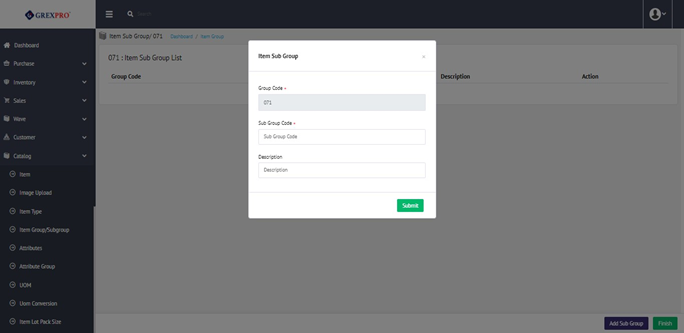
Either you can create subgroup for already existing item group, or you can create new group and then subgroup of the same. To create subgroup, click the Add Sub Group button located at the bottom-right corner of the screen.

This will open the following pop-up where you can provide a Subgroup Code and description followed by the 'Submit' button.
To complete the process, you need to click on the 'Finish' button visible at the bottom-right corner of the screen.

To edit a subgroup, click on the edit icon from the Action column.

The rest of the process is the same as 7.3.2. Subgroup.
To delete a subgroup, click the delete icon from the Action column.
To clone any entity, select an entity from the list, then click the 'Action' button located at the top-right corner of the screen, and select 'Clone' from the dropdown.

The rest of the process is the same as 7.3.1. Add .
To edit an entity, select a group from the list, then click the 'Action' button located at the top-right corner of the screen, and select 'Edit' from the dropdown.
The rest of the process is the same as 7.3.1. Add, however, you cannot change the Group Code.
The Delete option is only available for entries which do not have subgroup. To delete an entry, you need to select an entry and click on the 'Action' button located at the top right corner of the screen and click on the 'Delete' option from the dropdown.
The Export button given at the bottom centre of the screen facilitates you to download a list of visible Item Groups.
Attributes are the foundation of product (item) data and must be created prior to creating items. They are properties of items attached to an item and provide the specifications of the item, e.g. Size = Large, Colour = Blue. On the landing page, you can see a list of all attributes:
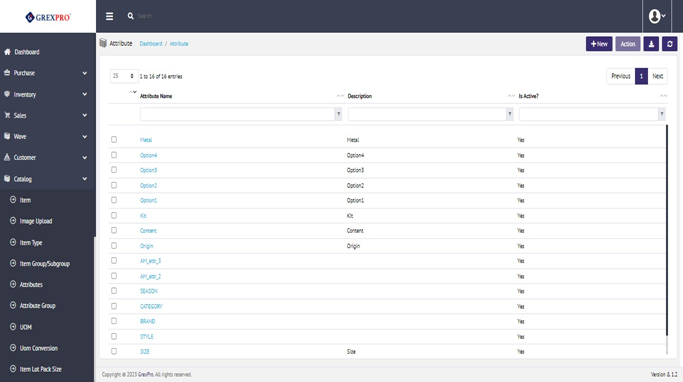
To add an attribute, you need to click the 'New' button located at the top-right corner of the screen. The process of adding attribute has been divided into two steps:
Attribute and Value.
You need to provide unique attribute name and to move to next step click the 'Next' button at the bottom-right corner of the screen.

You need to provide Attribute Value, which is mandatory field and click the 'Add' button, in-order to add a new value to an attribute. Each value should be unique.

To edit a value, click on the Edit icon and the rest of the process is the same as 7.4.1. Add .
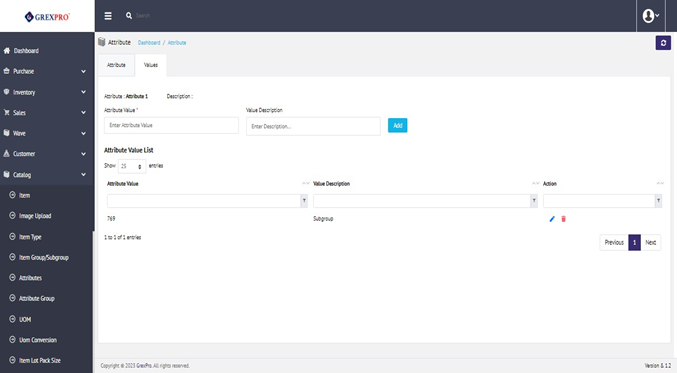
To delete a value, click the Delete icon.

There are two ways to edit an attribute: click Attribute Name or select an entry which you want to edit: Click the Action button located at the top-right corner of the screen and select Edit from the dropdown.
The rest of the process is same as 7.4.1. Add , however, you cannot edit Attribute Name.
The Export button given at the bottom centre of the screen facilitates you to download a list of the visible Attributes.
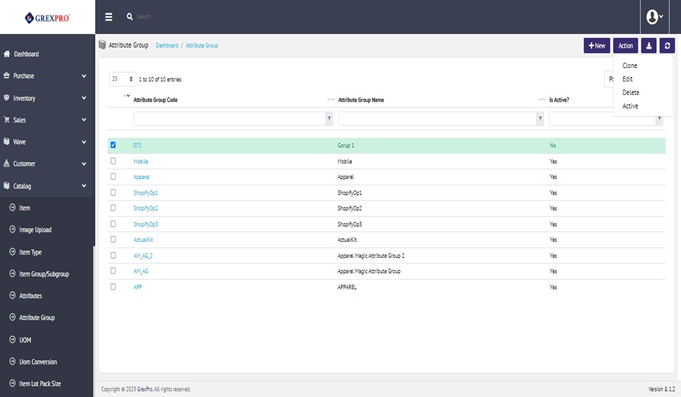
When added to items, items are grouped together, and the group is added to items, rather than single attributes. For example, an item may have 3 attributes, colour, size, and style, whereas another item may have only two, color and size, or some other combination of any number of attributes. On the landing page, you can see a list of all the attribute groups.

To add an attribute group, you need to click on the 'New' button located at the top-right corner of the screen, which will lead you to the following screen, where you need to enter Attribute Group code and the Attribute Group Name.

Once you fill in the required fields, you can see a Group Setup form where you can select multiple attributes from the Create Group dropdown to create a group in which Size is a default attribute which you cannot uncheck.

Once you are done with all the setup, you can click on the 'Save' button located at the bottom-right corner.
Note: To define attribute group, you can display minimum 2 or maximum 4 in the grid; rest attributes can be checked as mandatory. Also, only SIZE can be displayed in column.
There are two ways to edit an attribute group; click the Attribute Group Code or select an entry which you want to edit, click the Action button located at the top-right corner of the screen and select Edit from the dropdown.

To clone any entity, select an entity from the list, then click the 'Action' button located at the top-right corner of the screen and select 'Clone' from the dropdown.
The Delete option is only available for entries that are not interlinked with the other modules of the system. To delete an entry, you need to select an entry, click the 'Action' button located at the top right corner of the screen and click the 'Delete' option from the dropdown.
While clicking on the Delete link, it will open a confirmation pop-up. Once you clicked on Yes, it will delete the entry.
The option to change status is only available for entries that are not interlinked with other modules of the system. To change the status of an entry, you need to select an entry and click on the 'Action' button located at the top right corner of the screen and click on the 'Active/Inactive' option from the dropdown.
The Export button at the bottom center of the screen facilitates you to download a list of visible Attribute Groups.
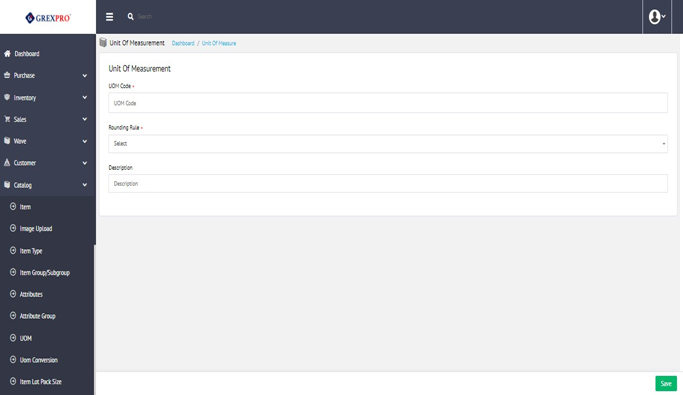
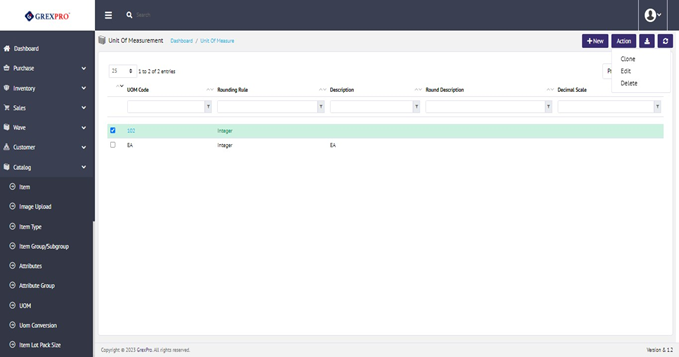
The Units of Measure refer to various ways by which items may be measured. In many instances, it may be numbers (integer units), e.g., 100 widgets in other cases, the item may be measured in decimal. On this page, you can see a list of existing UOMs.

You can add UOM by clicking on the 'New' button located at the top-right corner of the screen, which will lead you to the following screen, where you need to enter the UOM code and Rounding Rule. UOM code should be unique. Click on the 'Save' button to complete the process.
There are two ways to edit UOM: either click UOM Code or select an entry that you want to edit. Click the Action button located at the top-right corner of the screen and select Edit from the dropdown.
To clone any entity, select an entity from the list, then click on the 'Action' button located at the top-right corner of the screen and select 'Clone' from the dropdown.
The Delete option is only available for entries that are not interlinked with other modules of the system. To delete an entry, you need to select an entry and click on the 'Action' button located at the top right corner of the screen and click on the 'Delete' option from the dropdown.
The Export button at the bottom center of the screen facilitates you to download a list of visible UOMs.
Units of Measure Conversion by which user can setup factors for converting two Units Like Kilogram to gram is 1gm=.0001 Kg Or 1Kg =1000 gm
Once the user sets up the conversion factor, decimal and rounding rules, then in SO and PO all the transaction, shows the item UOM as per selection from the transaction and the Qty. gets converted based on the UOM selected in transaction after comparing the base item's UOM.

To add UOM Conversion, you need to click on the 'New' button located at the top-right corner of the screen, which will lead you to the following screen where you need to enter From UOM and TO UOM, Conversion factor, and Rounding Rule. UOM code should be unique. Click on the 'Save' button to complete the process.

There are two ways to edit UOM Conversion: either click UOM conversion record or select an entry which you want to edit, click on the Action button located at the top-right corner of the screen and select Edit from the dropdown. The rest of the process will remain the same as 7.8.1. Add.

The Delete option is only available for entries that are not interlinked with other modules of the system. To delete an entry, you need to select an entry and click the on 'Action' button located at the top right corner of the screen, and click on the 'Delete' option from the dropdown.
To clone any entity, select an entity from the list, then click on the 'Action' button located at the top-right corner of the screen and select 'Clone' from the dropdown.
The Export button given at the bottom center of the screen facilitates you to download a list of visible UOMs Conversion in CSV, Excel, & PDF.
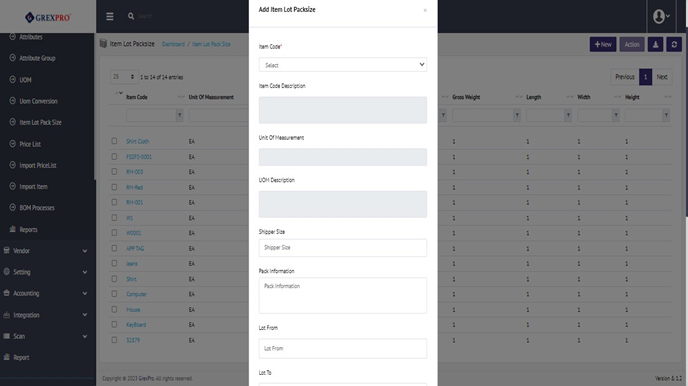
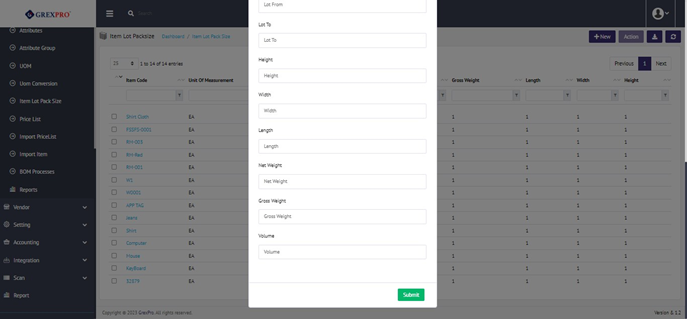
Item Lot Pack Size refers to the details of case packing by which items may be received from the supplier and/or sent out to the customer. While it may not apply to every item type, group/subgroup or SKU, for many others, items may arrive at the warehouse in pre-defined cases (packs) containing a specified number of the individual items, e.g., 24 cans per case.

To add a new Item Lot Pack Size, you need to click on the 'New' button located at the top-right corner of the screen, which will open the following pop-up where you need to select an item code from the dropdown. There are other attributes like Shipper Size, Shipper Size, Pack Information, Lot From, Lot To, Height, Width, Length, Net Weight, Gross Weight, and Volume. To complete the process, simply click on the 'Submit' button placed at bottom of the pop-up.
There are two ways to edit an item lot pack size;, either click on the Item Code or select an entry which you want to edit., Cclick on the Action button located at the top-right corner of the screen and select Edit from the dropdown.

On edit, you can see the following screen where you can make changes in the attributes. If item has multiple sub-item or variants, you need to click on '+' sign to expand the option and make changes in pack size.

Once done with theh editing, you need to click on the 'Update' button located at the bottom-right corner of the screen.
The Export button given at the bottom center of the screen facilitates you to download a list of the visible Item Lot Pack Size.
Price Lists contain pricing information for items and can be associated with organization sites, customers, and vendors. The lists may or may not contain all the item types, groups and subgroups in a given catalog. On the landing page, you can see a list of all price lists.

To add a new price list, you need to click on the 'New' button located at the top-right corner of the landing page, which will open the following pop-up:
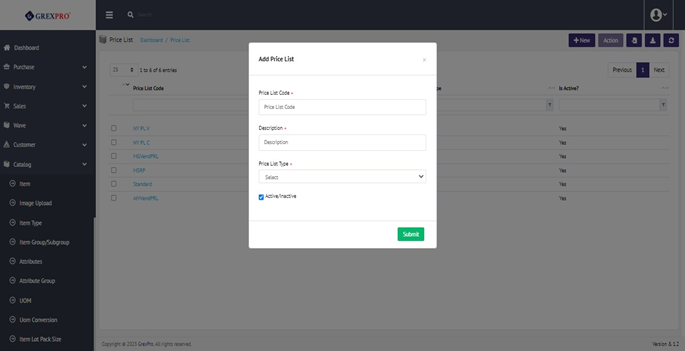
You need to provide all required details, including Price List Code, Description, and Price List Type (Customer or Vendor). In order to process to the next step, click on the 'Submit' button after filling in all the details., Tthis will lead you to the following screen:

There are two ways to edit a price list;, either by clicking the on Price List Code or selecting an entry which you want to edit., Cclick on the Action button located at the top-right corner of the screen and select Edit from the dropdown.

On edit, you can see the following screen where you can make changes in the fields. If the item has multiple sub-item or variants, you need to click on the '+' sign to expand the option and make changes in the price list.
Once done with editing, you need to click on the 'Update' button located at the bottom-right corner of the screen.
To clone any entity, select an entity from the list then click on the 'Action' button located at the top-right corner of the screen and select 'Clone' from the dropdown.
The Delete option is only available for entries which that are not interlinked with other modules of the system. To delete an entry, you need to select an entry and click on the 'Action' button located at the top right corner of the screen., Cand click on the 'Delete' option from the dropdown.
On click of Delete link, it will open aa confirmation pop-up will appera on the screen. Once you clicked on Yes, it will delete the entry.
The option to change status is only available for entries which that are not interlinked with other modules of the system. To change the status of an entry, you need to select an entry and click on the 'Action' button located at the top right corner of the screen., Cand click on the 'Active/Inactive' option from the dropdown.
The Export button given at the bottom centre of the screen facilitates you to download a list of the visible Price Lists .
This Import menu is for Importing Catalog from the CSV data file. Import from CSV is a feature by which users can import Sales Order data into Celero system from data saved into a CSV format file.
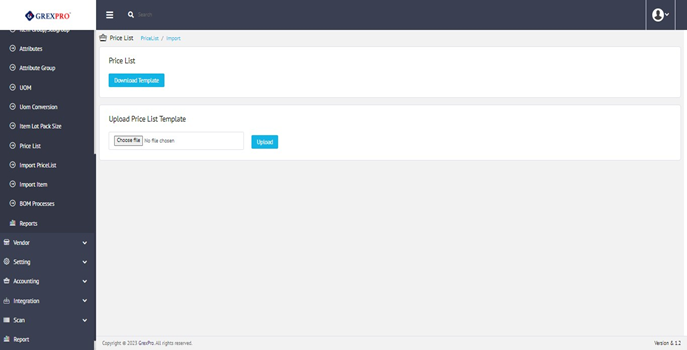
To import the data, first user needs to download the template created for the process. To download the template for Sales Order, the users can use the "Download" button.
After downloading, the user needs to fill in the data in the given format and then try to upload the file by the "Choose file" option given in the upload area. Once the file is chosen, the user can needs to click the upload button, and then theto begin the data uploading process. starts.
If an error occurs in validating or data syncing process during data integration, the log creates displayed in the Log section. Users can check each recorded error, and after correction, it can be uploaded again.
After all the data is uuploading the dataed successfully, the users can see the log in the system. then also a log is displayed in the system.
Logs displayed can be cleared by using the "Reset" button in the Upload section.

Here, you can add other information, such as BOM Process. Additionally, the users can and click on the Add button and to mention all the necessary options and and save it by clicking on the "Save" button.
Click on 'Save' to move to next step.
There are two ways to edit a price list;, either click on BOM Process Name or select an entry which you want to edit, click on the Action button located at the top-right corner of the screen and select Edit from the dropdown.

The Delete option is only available for entries which that are not interlinked with other modules of the system. To delete an entry, you need to select an entry and click on the 'Action' button located at the top right corner of the screen, and click on the 'Delete' option from the dropdown.
The Export button given at the right corner of the screen facilitates allows you to download a list of visible email categories.