Organization Setup refers to the basic data connected to your organization and is required to be implemented prior to the creation of the Master Data. This is done during the implementation phase of the project and may not change very frequently.
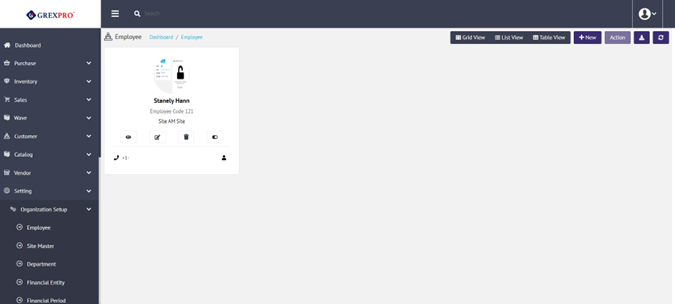
Here, you can see a list of all employees associated with your organization. You can change the view of showing the list by using options provided on the top of the list. Options include Grid View, List View, and Table View.

To add a new employee, you need to click on the 'New' button located on the top-right corner of the Employee List's screen, which will lead you to the following screen, where you need to provide some basic details in order to add an employee.
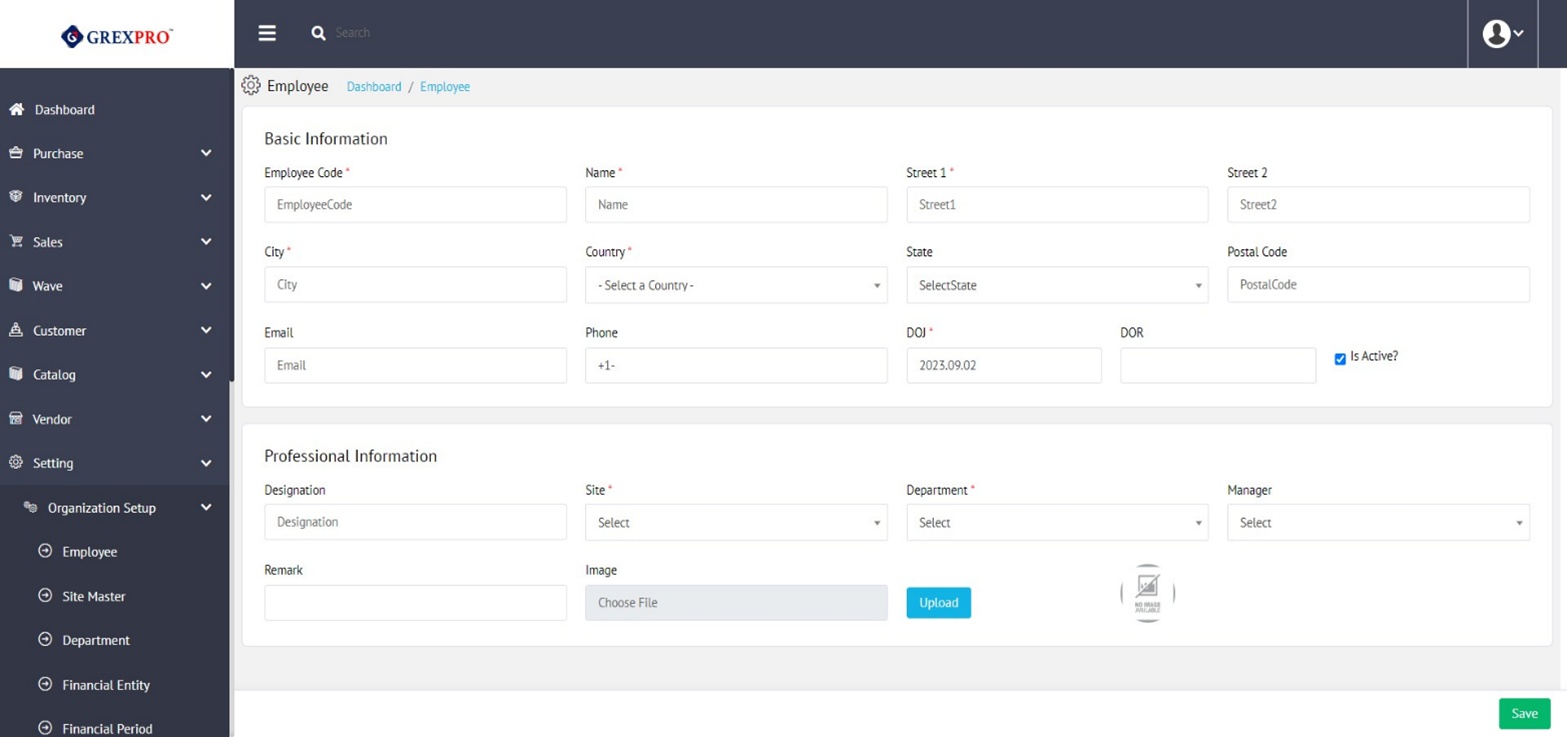
Name, Employee Code, DOJ, Site, and Department are the mandatory fields.
To view details about an employee, you can either click on the view icon or on the image. This will take you to the following page:

To edit information about any employee, you can simply click on the Edit icon.
You can also edit the employee information from View employee details page.

You can update all the information except the Employee Code. After editing the information, you need to click on the Update button located at the bottom-right corner to store the details on the system.
You cannot delete an employee entry which that is interlinked with some other phase of the system. For such employees, the option of delete is disabled, as shown below.
If a user's entry is not in use, you can delete that user by clicking on the Delete icon.
You cannot change the status of the employee who is interlinked with some other phase of the system. For such employees, the inactive option is disabled. You can active/inactive in the edit page as shown below.

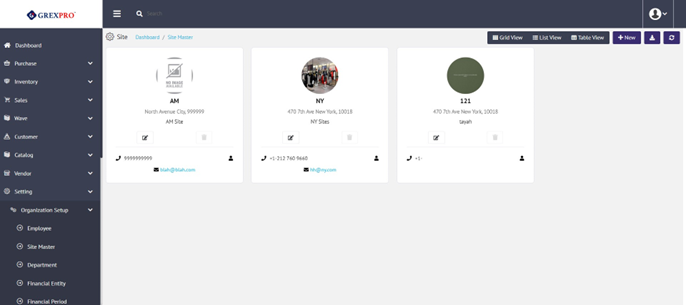
Site information refers to the various locations within the organization. These sites may or may not be warehouses; they may be headquarters, sales offices, or other such locations. Inventory operations are always based on warehouses. However, other sites may play a role in other ways within the application. You can see a list of all sites in three different views, including Grid View, List View, and Table View.

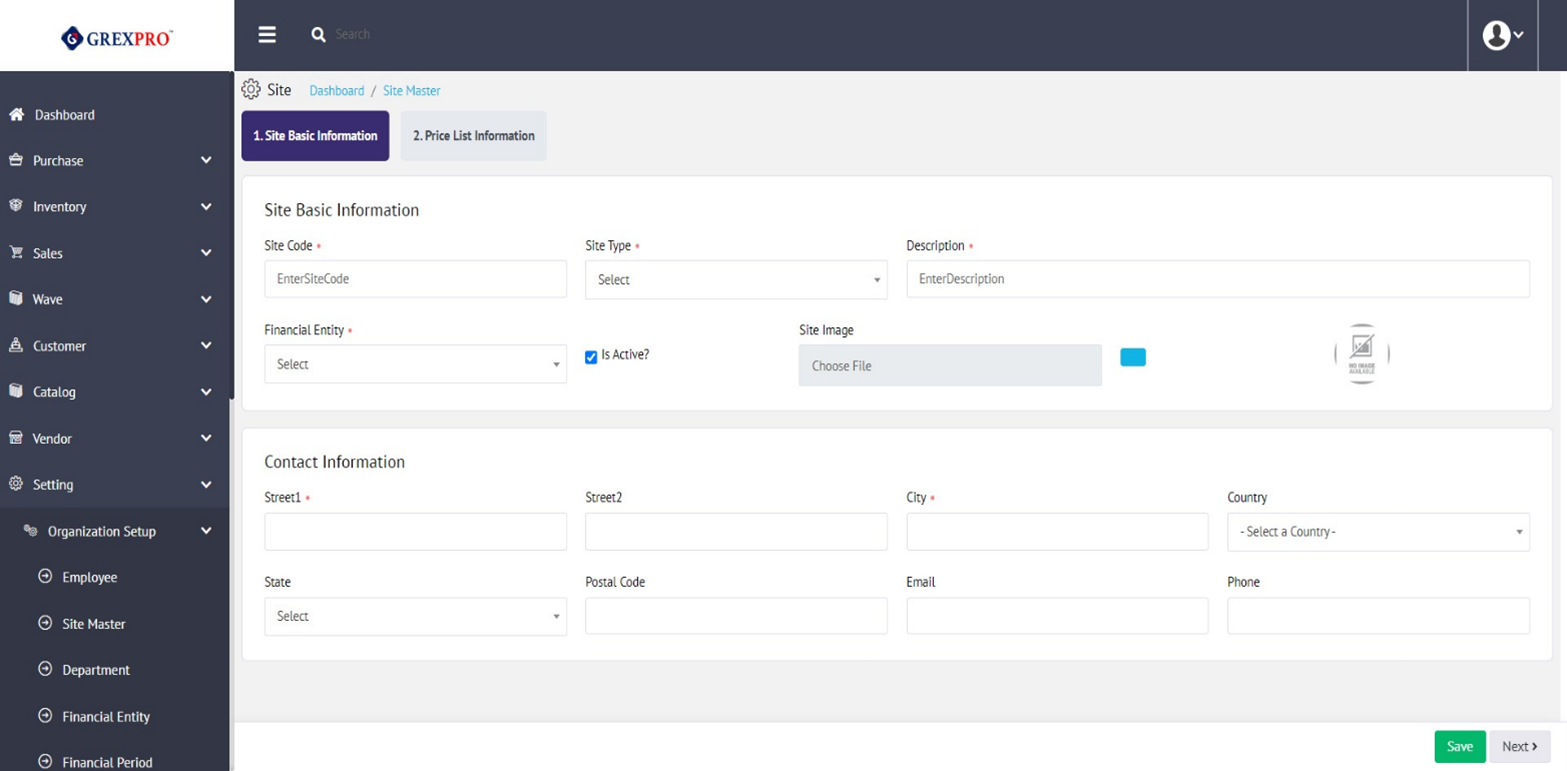
To add a new site, you need to click on the 'New' button located on the top-right corner of the Site List's screen, which will lead you to the following screen. Adding a new site is divided into two steps: Basic Information and Price List Information.
Here, you need to provide the basic information including site code, site type, description, financial entity, and address. There are a few optional fields like including email, phone number, images, etc.,. which you can leave blank. Before moving to the next step, you need to save the information by clicking the 'Save' button given on the bottom-right corner. Once you have saved the info, click on the 'Next' button.
At this stage, you can add multiple price list using the Add Price List button given at the bottom-right corner.

It will open the following pop-up where you need to select Price List and Currency, whereas the Description field is optional. After selecting the required information, click on submit.
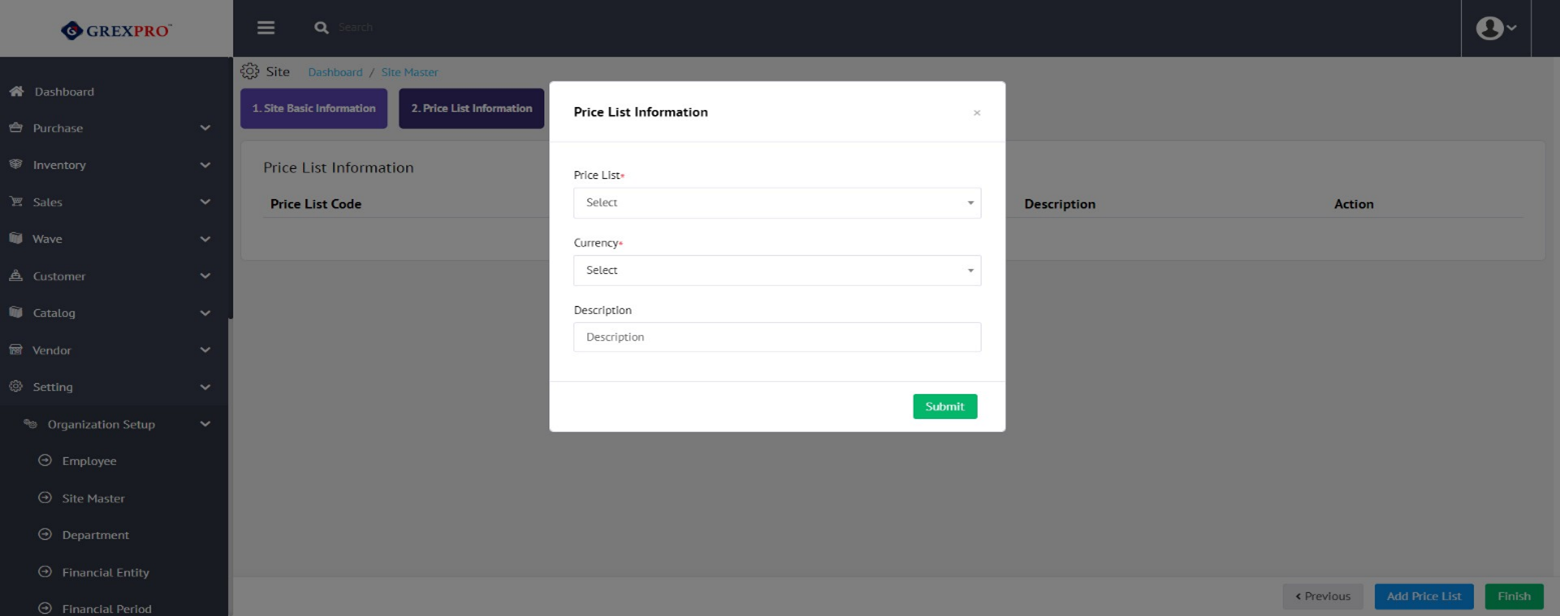
To complete the process, you need to click on the Finish button.
To edit information about any site, you can simply click on the Edit icon or site image.
You can make changes in every field except Site Code.
You cannot delete a site entry which is interlinked with some other phase of the system. For such sites, the option of delete is disabled as shown below.

If site is not in use, you can delete that site by clicking on the Delete icon.
Departments are organizational units that employees belong to. Departments may or may not go across sites. For this reason, there's no explicit relationship between sites and departments. On the landing page of the department, you can see a list of all departments.
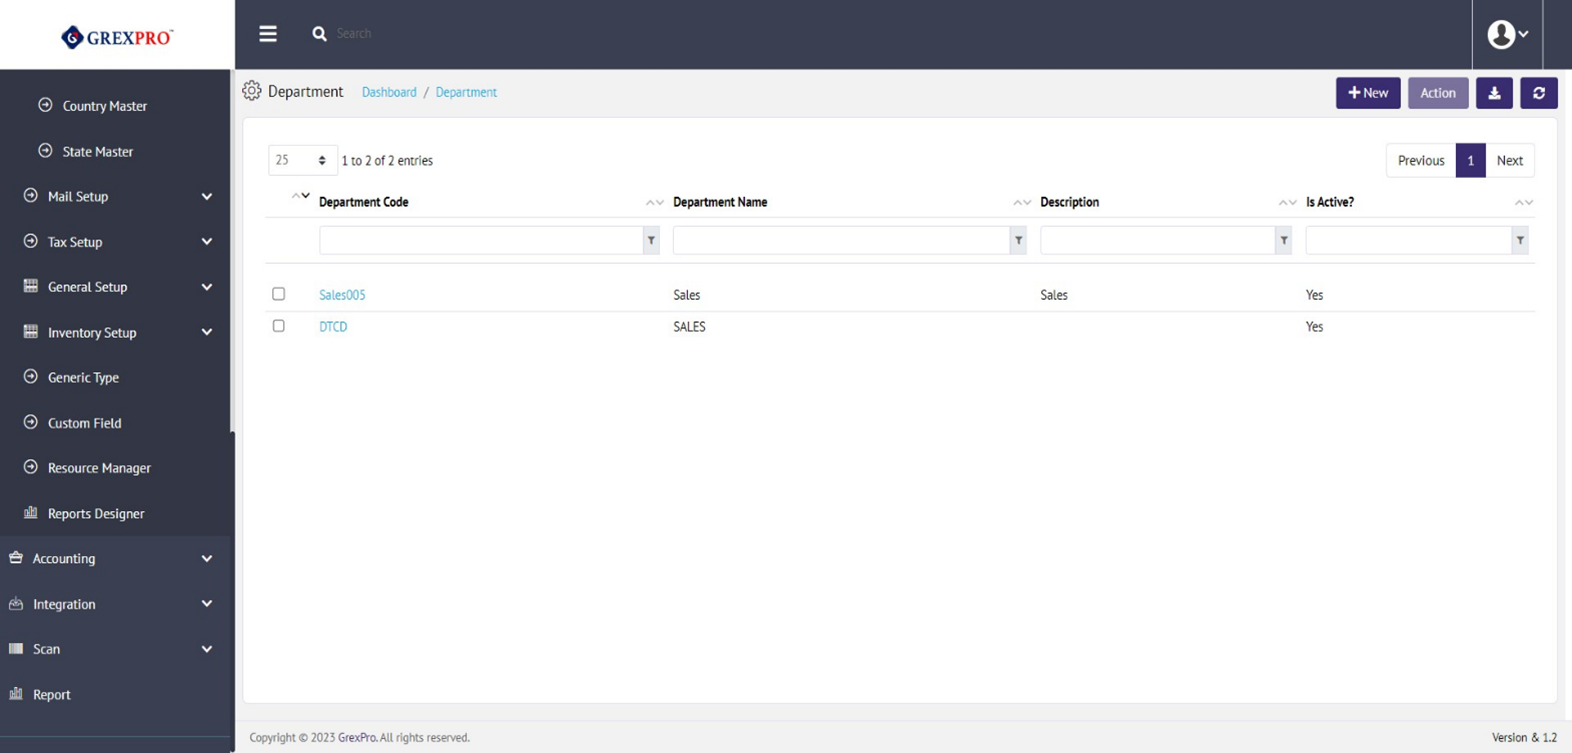
In order to add new department, you need to click on the 'New' button located on the top-right corner of the Department List page.

You need to fill in the Department Code, Department Name and Description about the department you wish to add and click on the 'Save' button located at bottom-right corner of the screen.
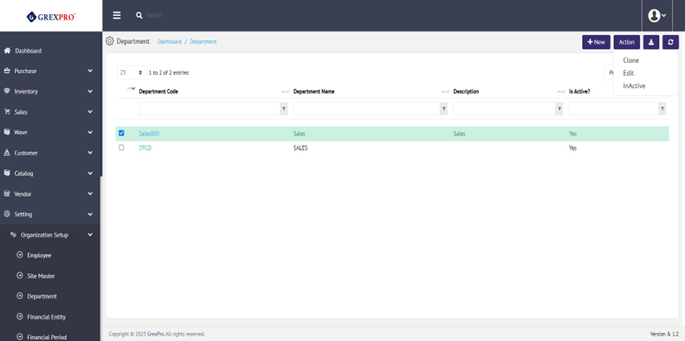
There are two different ways to edit department information:; either you can click on the 'Department Code' link or select the entity you want to edit, click on the 'Action' button located at top-right corner and click on Edit from the dropdown.
You cannot delete a department entry which is interlinked with any other part of the system. For such department, option for Delete is missing as shown below:
If department is not in use, you can delete that department by clicking on the Delete option from the Action dropdown.
You can easily create a duplicate department only by giving a unique Department Code. To clone an entry, select a department, click on the Action button located at the top-right corner of the screen, and select Clone option from the list.
You cannot change the status of a department entry which is interlinked with any other part of the system.
If a department is not in use, you can change the status of that department using the Inactive/Active option from the Action dropdown.
The Export button at the right corner of the screen allows you to download a list of visible email categories.
Financial Entities are organizational units that are used in all financial-related transactions within the application. All transactions that have a financial component - e.g., purchase orders, sales orders, and invoices - must specify a financial entity code. On the landing page of Financial Entity Master, you can see a list of all the Financial Entities.

Click the 'New' button located at top-right corner of the Financial Entity Master screen, to add new Financial Entity. This will take you to the following page:
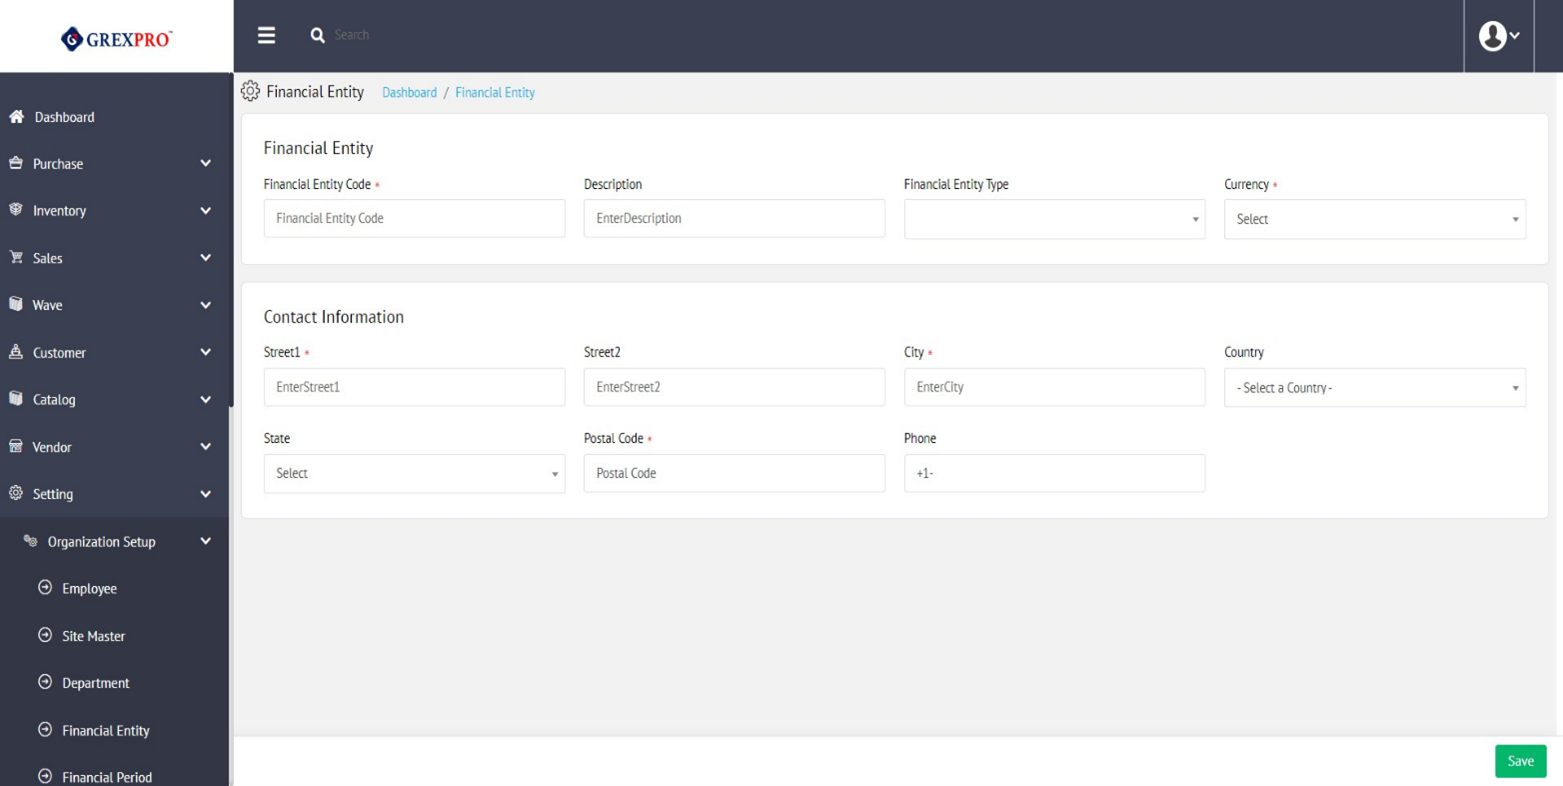
By filling required fields, you can click on the Save button situated at the bottom-right corner of the screen.
There are two different ways to edit Financial Entity information:- either you can click on the 'Financial Entity Code' link or select the entity you want to edit, click on the 'Action' button located at the top-right corner and click on Edit from the dropdown.
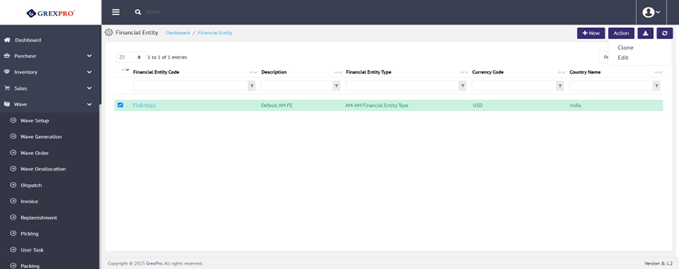
You can easily create a duplicate Financial Entity only by giving a unique Financial Entity Code. To clone an entry, select a Financial Entity from the Financial Entities' list, click on the Action button located at the top-right corner of the screen and select the Clone option from the list.
You cannot delete a Financial Entity entry which is interlinked with any other part of the system. For such Financial Entity, option for Delete is missing as shown below:
If Financial Entity is not in use, you can delete that Financial Entity by clicking on the Delete option from the Action dropdown.
The Export button given at the right corner of the screen allows you to download a list of visible email categories.
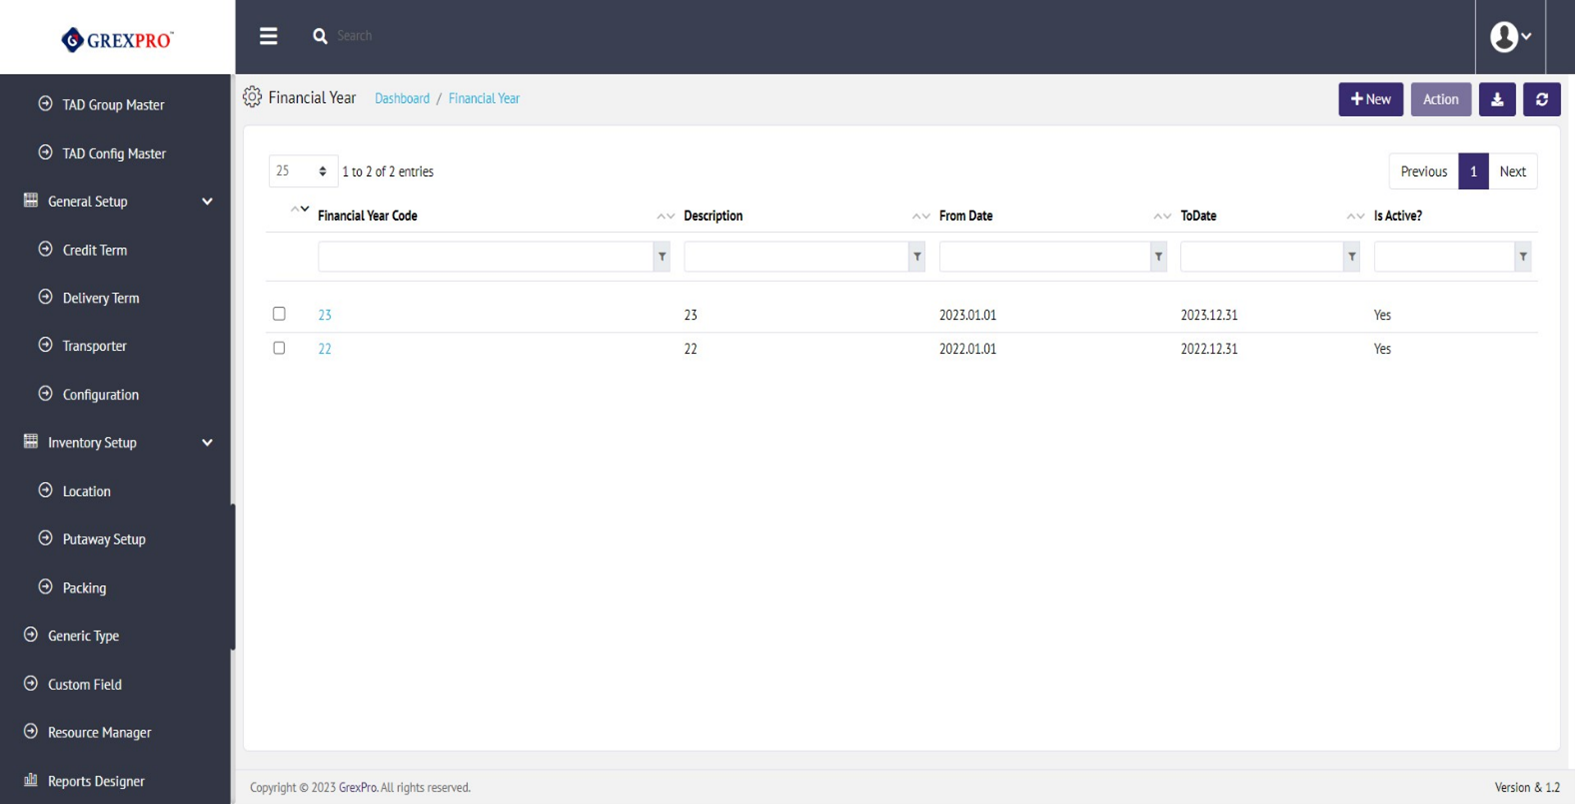
The financial year for an organization may be the calendar year, or any other period of time, e.g., May 1st to April 30thth. This year may be broken up into financial periods. If an organization uses monthly reporting, then there will be 12 monthly periods defined, and if an organization uses weekly, then 52 records will get be created.
On the landing page, you can see a list of Financial Year Records' list as follows:
Click on the 'New' button located at the top-right corner of the Financial Periods Master screen, to add new Financial Period. This will take you to the following page:

By filling in the required fields, you can click onuse the Save button situated at the bottom-right corner of the screen to save the input.
If you set any Financial Period to Inactive, then you won't be ablewill be unable to perform any operation during that period.
There are two different ways to edit Financial Period information:; either you can click on the 'Financial Period Code' link or select the entity you want to edit, click on the 'Action' button located at the top-right corner and click on the Edit button from dropdown.
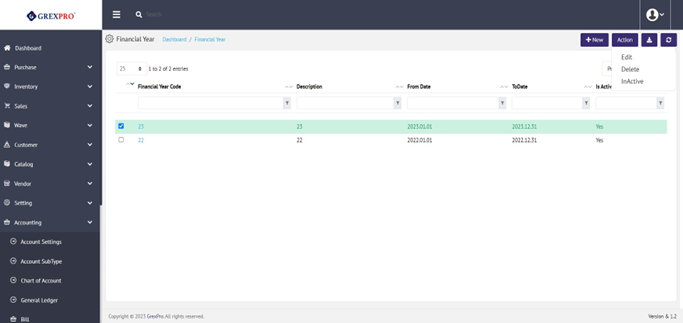
Select the Financial Year entity you want to delete, click on the 'Action' button located at the top-right corner and click on the Delete button from the dropdown.
You can change the status of Financial Year entry by clicking on the Inactive/Active option from the Action dropdown.
The Export button given at the right corner of the screen facilitates allows you to download a list of visible email categories.
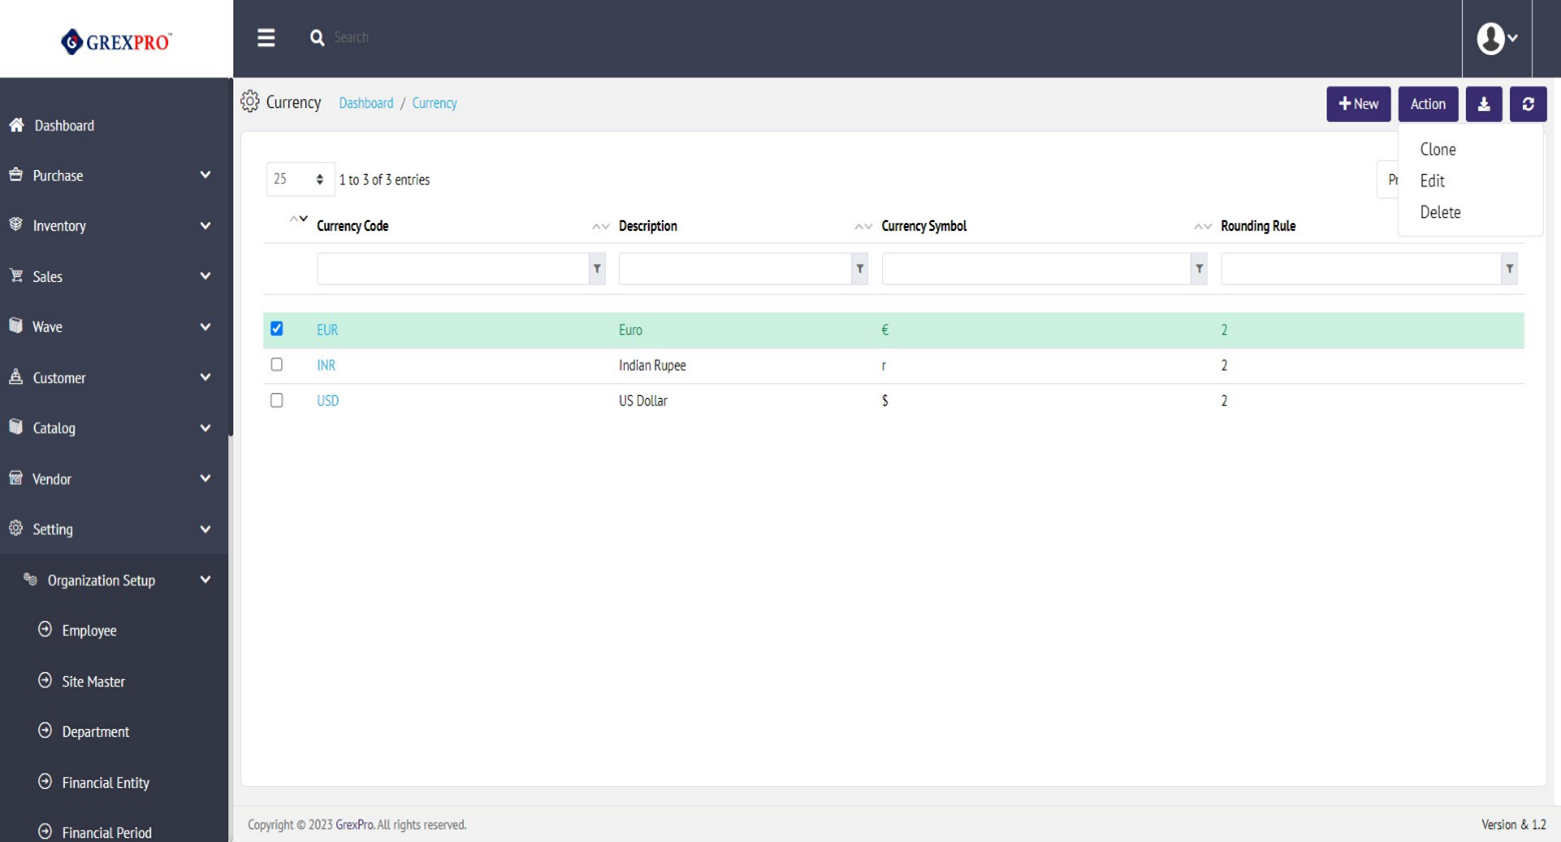
Currency contains the type of currency used for financial data within the application. On the landing page, you can see a list of all currency entities.
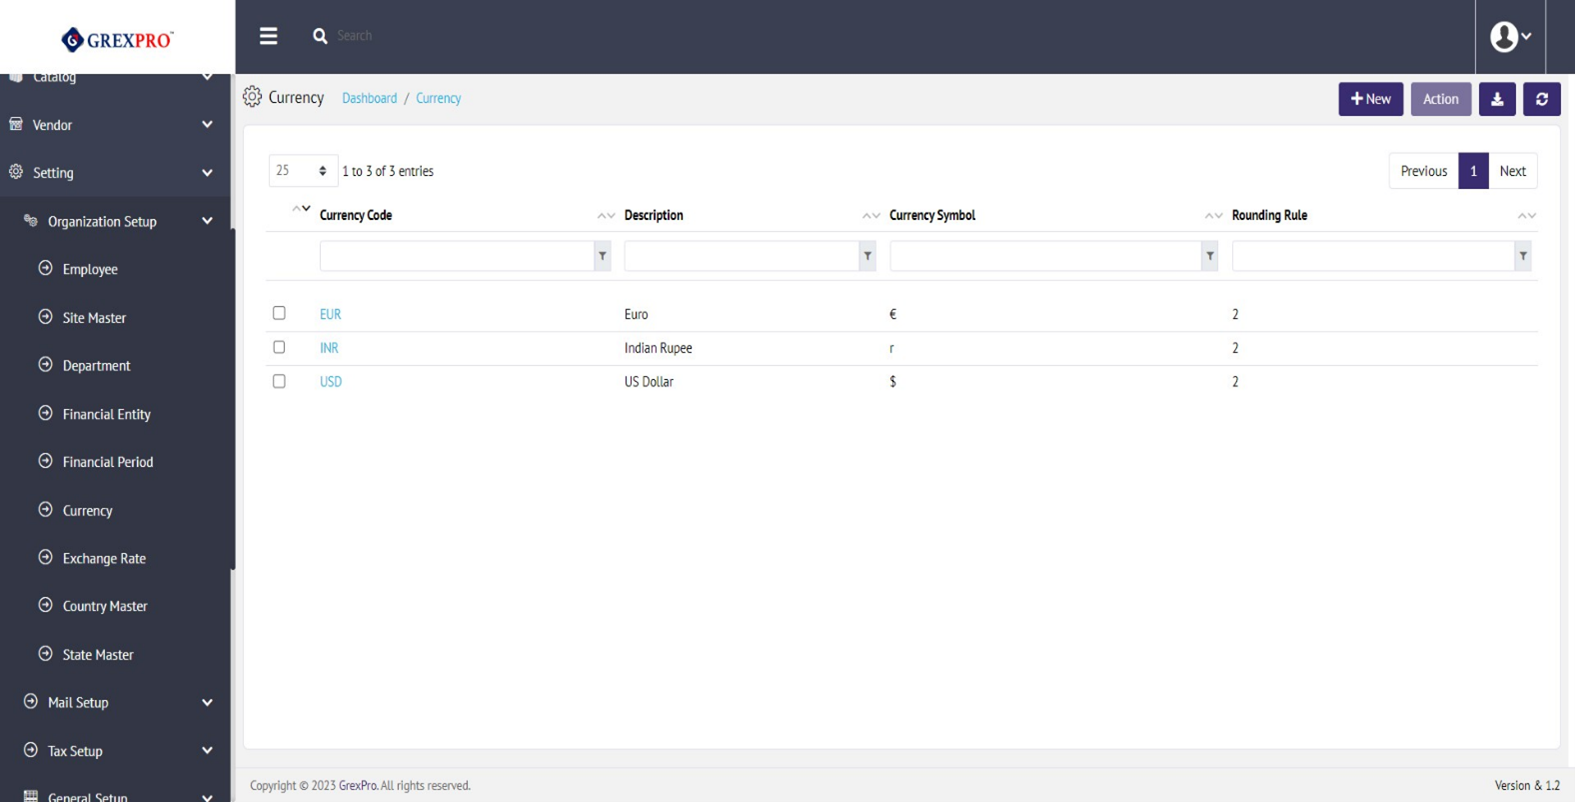
Click on the 'New' button located at the top-right corner of the Currency screen , to add new currency. This will take you to the following page:
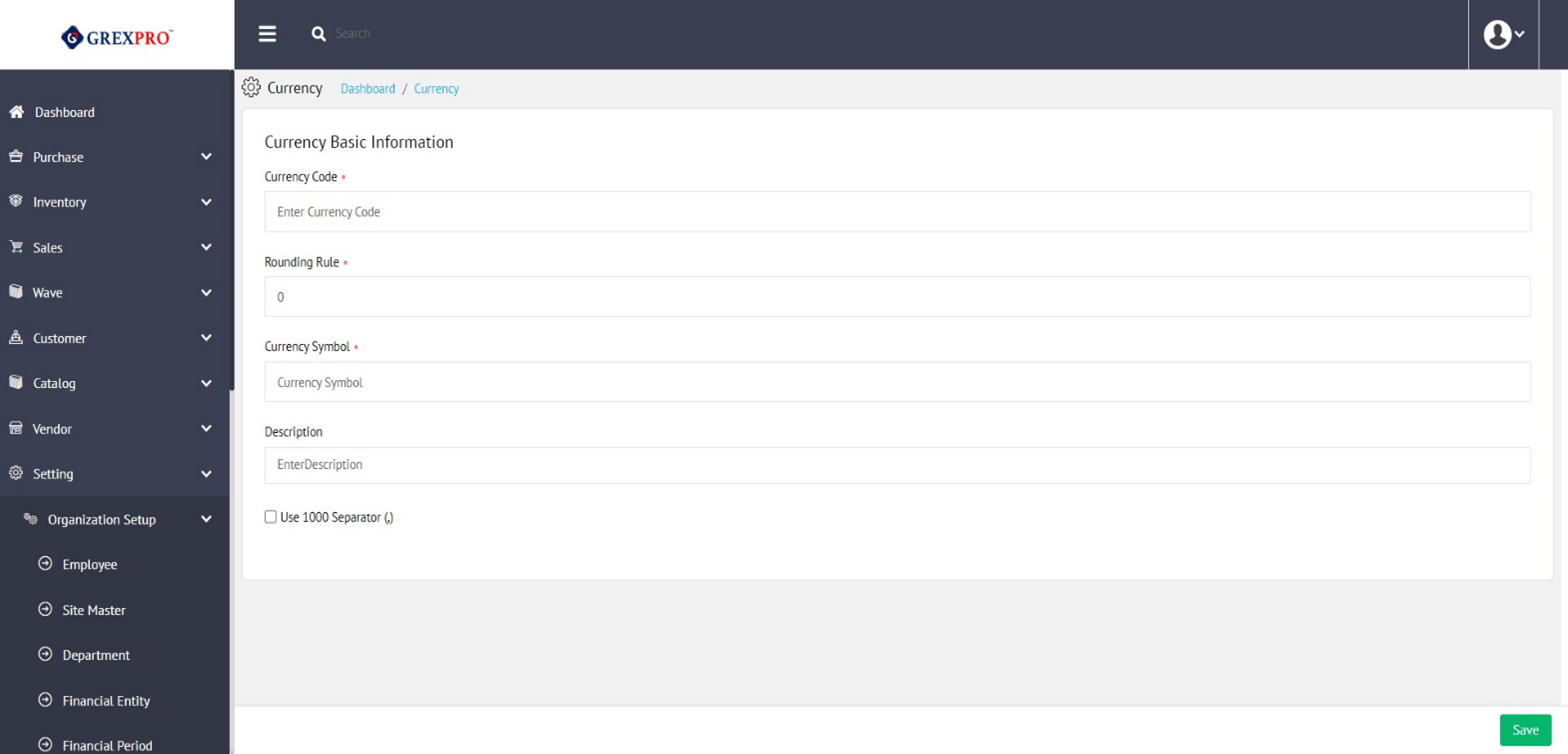
By filling in all the required fields, you can click on the Save button located at the bottom-right corner of the screen.
There are two different ways to edit Currency information:; either you can click on the 'Currency Code' link or select the entity you want to edit by, clicking on the 'Action' button located at top-right corner and then using click on Edit from dropdown.
Rest of the process is the same as a 9.1.6.1. Add new Currency.
To clone an entry, select a department, click on the Action button located at the top-right corner of the screen, and select the Clone option from the list. You cannot add a currency with the same currency code and date range.
Select the currency code entity you want to delete, click on the 'Action' button located at the top-right corner, and click on the Delete button from the dropdown.
The Export button given at the right corner of the screen facilitates allows you to download a list of visible email categories.
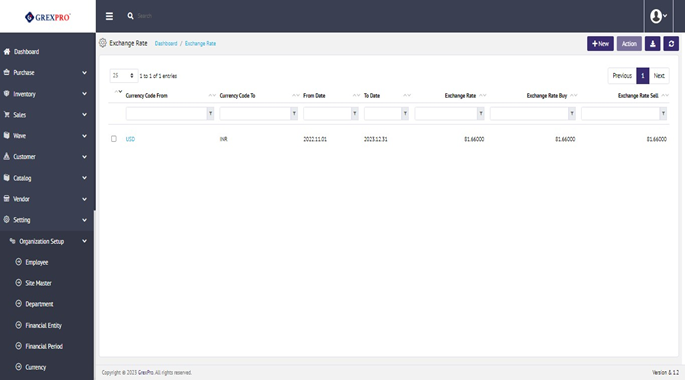
Exchange Rate Master contains the currency exchange rate information used for financial data within the application. On the landing page, you can see a list of all currency exchange entities.
Click on the 'New' button located at the top-right corner of the Exchange Rate screen, to add new Exchange Rate. This will take you to the following page:
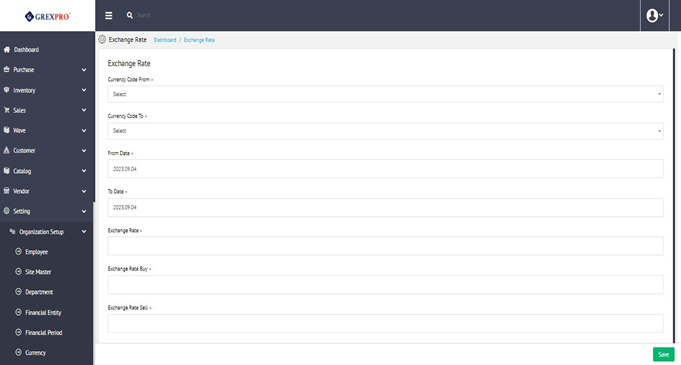
By filling in all the required fields, you can click on the Save button located at the bottom-right corner of the screen.
There are two different ways to edit Exchange Rate information: ; either you can click on the 'Currency Code From' link or select the entity you want to edit, click on the 'Action' button located at the top-right corner and then, click on Edit from dropdown.

To clone an entry, select a department, click on the Action button located at the top-right corner of the screen, and select the Clone option from the list. You cannot add an exchange rate with the same currency code and date range.
Select the Exchange Rate entity you want to delete, click on the 'Action' button located at the top-right corner, and click on Delete from the dropdown.
The Export button given at the right corner of the screen facilitates allows you to download a list of visible email categories.
Country Master contains the country name, code, and dial code information used for the location data within the application. On the landing page, you can see a list of all country codes entities.

Click on the 'New' button located at the top-right corner of the country master screen, to add new country details. This will take you to the following page:

By filling i all the required fields, you can click on the Save button located at the bottom-right corner of the screen.
There are two different ways to edit information:; either you can click on the 'Country Code From' link or select the entity you want to edit., Cclick on the 'Action' button located at the top-right corner and then clickclick on Edit from the dropdown.

The rest of the process is the same as a 9.1.8.1. Add new country master.
To clone an entry, select a department, click on the Action button located at the top-right corner of the screen, and select Clone option from the list. You cannot add an exchange rate with the same currency code and date range.
Select the country code entity you want to delete, click on the 'Action' button located at the top-right corner, and click on the Delete from dropdown.
The Export button given at the right corner of the screen facilitates allows you to download a list of visible email categories.
State Master contains the state name, state code, country name, code, and dial code information used for location data within the application. On the landing page, you can see a list of all country codes entities.

Click on the 'New' button located at the top-right corner of the state master screen, to add new state details. This will take you to the following page:

By filling in all the required fields, you can click on the Save button located at the bottom-right corner of the screen.
There are two different ways to edit information:; either you can Cclick on the 'State Code From' link or select the entity you want to edit, click on the 'Action' button located at the top-right corner, and click on Edit from the dropdown.

The rRest of the process is the same as 9.1.9.1. Add a new State Master.
To clone an entry, select a department, click on the Action button located at the top-right corner of the screen, and select the Clone option from the list. You cannot add an exchange rate with the same currency code and date range.
Select the State code entity you want to delete, click on the 'Action' button located at the top-right corner and click on Delete from the dropdown.
The Export button given at the right corner of the screen facilitates allows you to download a list of visible email categories.
There are following predefined email categories asincluding:

To edit any of the email template, simply click on the category name which will open the following screen. You can only change the description.
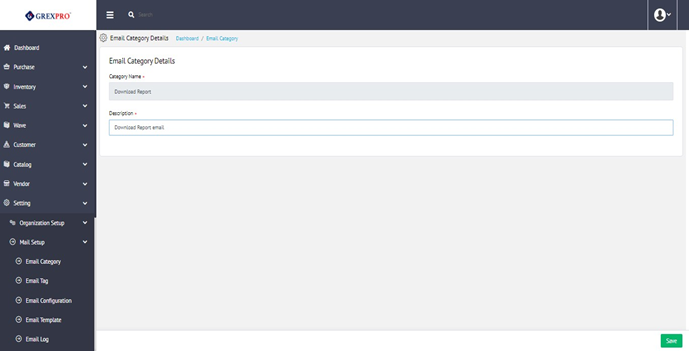
The Export button given at the right corner of the screen facilitates allows you to download a list of visible email categories.
Here you can see a list of email tags.

The Export button given at the right corner of the screen facilitates allows you to download a list of visible email categories.
On this page, you can view email configuration for categories:

To edit entry, click on the category name, which will open the following screen:

Apart from the Category Name, you can edit every other field on the form. Once done with the changes you want to make, click on the 'Save' button.
The Export button given at the right corner of the screen facilitates allows you to download a list of visible email categories.
On the landing page, you can see various pre-defined templates that you can be edited by clicking on “Email Template Name”
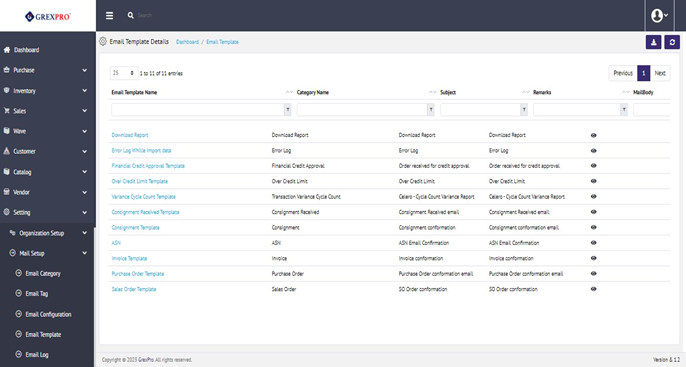
On clicking the “Email Template Name,”, the following form will be opened where you can make changes in the Subject, Remarks, Tags, and Mail body. Once done with changes, you need to click on the 'Save' button.

The Export button given at the right corner of the screen facilitates allows you to download a list of visible email categories.
Here you can view a log of all emails send through the system:

To view the mail body, click on the view icon.

The Export button given at the right corner of the screen facilitates allows you to download a list of visible email categories.
On the landing page, you can see a list of all tax setup, among which Excise, VAT, and GST are static and cannot be deleted:

To add a new tax rule, you need to click on the 'New' button located at the top-right corner of the screen, which will lead you to the following page where you need to enter all required information about tax.

Click on the Save button located at the bottom-right corner.
There are two different ways to edit Tax Entity information:; either you can Cclick on the 'Tax Code' link or select the entity you want to edit, click on the 'Action' button located at the top-right corner, and click on Edit from the dropdown.

The rRest of the process is the same as 9.3.1.1. Add a new Tax Entity.
To clone an entry, select a tax entry, click on the Action button located at the top-right corner of the screen and select the Clone option from the list.
The rRest of the process is the same as 9.3.1.1. Add a new Tax Entity.
The Delete option is only available for entries which that are not interlinked with other modules of the system. To delete an entry, you need to select an entry. Andand Cclick on the 'Action' button located at the top right corner of the screen, andscreen, and click on the 'Delete' option from the dropdown.
The Export button given at the right corner of the screen facilitates allows you to download a list of visible email categories.
On the landing page, you can see a list of discount codes.

To add a new discount code, you need to click on the 'New' button located at the top-right corner of the screen, which will open the following page where you need to provide the required information:

Click on the 'Save' button after filling in all the information.
There are two ways to edit a discount entry, either click on the Discount Code or select an entry which you want to edit., Clclick on the Action button located at the top-right corner of the screen and select Edit from the dropdown.

The rest of the process is the same as 9.3.2.1. Add , however you cannot change the Discount Code.
To clone any entity, select an entity from the list then click on the 'Action' button located at the top-right corner of the screen and select 'Clone' from the dropdown.
The rRest of the process is the same as 9.3.2.1. Add.
The Delete option is only available for entries which are not interlinked with other modules of the system. To delete an entry, you need to select an entry and click on the 'Action' button located at the top right corner of the screen and click on the 'Delete' option from the dropdown.
The Export button given at the right corner of the screen facilitates allows you to download a list of visible email categories.
On the landing page, you can see a list of additional charges.

To add a new additional charge code, you need to click on the 'New' button located at the top-right corner of the screen, which will open the following page where you need to provide the required information:
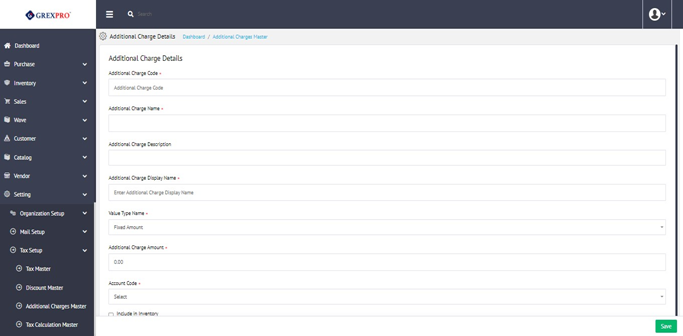
Click on the 'Save' button after filling in all the information.
There are two ways to edit an entry, either click on the Additional Charge Code or select an entry which you want to edit. C, click on the Action button located at the top-right corner of the screen and select Edit from the dropdown.

The rRest of the process is the same as .9.3.3.1. Add .
To clone any entity, select an entity from the list, then click on the 'Action' button located at the top-right corner of the screen, and select 'Clone' from the dropdown.
The rRest of the process is the same as .9.3.3.1. Add .
The Delete option is only available for entries which that are not interlinked with other modules of the system. To delete an entry, you need to select an entry and click on the 'Action' button located at the top right corner of the screen, and click on the 'Delete' option from the dropdown.
The Export button given at the right corner of the screen facilitates allows you to download a list of visible email categories.
On the landing page, you can see a list of tax calculation entries.

To add a new Tax Calculation rule, you need to click on the 'New' button located at the top-right corner of the screen, which will open the following page where you need to provide the required information:

Click on the 'Save' button after filling in all the information.
There are two ways to edit an entry, either click on the Calculation Name or select an entry which you want to edit., Cclick on the Action button located at the top-right corner of the screen and select Edit from the dropdown.

Rest of the process is the same as 9.3.4.1. Add.
The Delete option is only available for entries which that are not interlinked with other modules of the system. To delete an entry, you need to select an entry and click on the 'Action' button located at the top right corner of the screen, and click on the 'Delete' option from the dropdown.
The Export button given at the right corner of the screen facilitates allows you to download a list of visible email categories.
On the landing page, you can see a list of tad groups:

To add a new Tad Group, you need to click on the 'New' button located at the top-right corner of the screen, which will open the following page. YWhere you need to select Tad type and Group type from respective dropdowns,; followed by defining a new group using the Add New Button and moving items to that group using the arrow button.
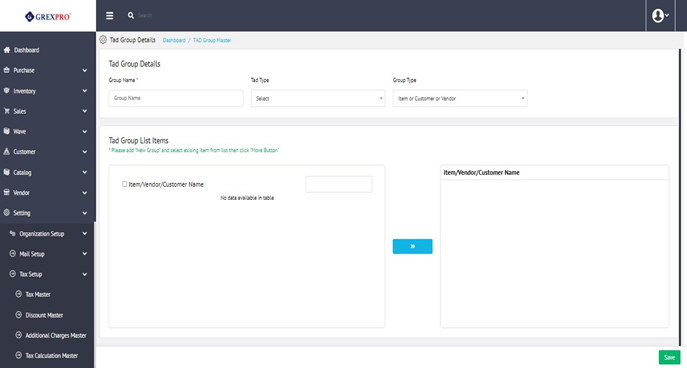
Click on the 'Save button after filling in all the information.
There are two ways to edit an entry, either click on the Group Name or select an entry which you want to edit, click on the Action button located at the top-right corner of the screen and select Edit from the dropdown.

Rest process is the same as 9.3.5.1. Add however, you cannot edit Tad Type and Group Type.
The Delete option is only available for entries which that are not interlinked with other modules of the system. To delete an entry, you need to select an entry and click onthe 'Action' button located at the top right corner of the screen and, click on the 'Delete' option from the dropdown.
The Export button given at the right corner of the screen facilitates allows you to download a list of visible email categories.
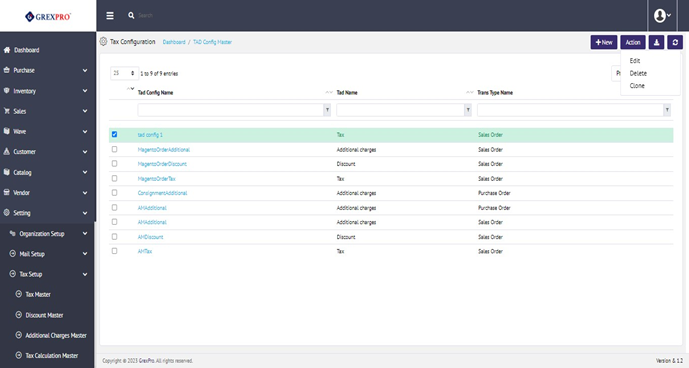
On the landing page, you can see a list of Tad Config entries.

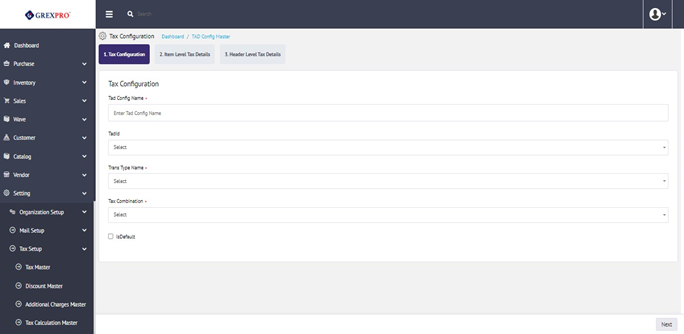
To add a new Tad Config, you need to click on the 'New' button located at the top-right corner of the screen which will open the following page. The process of adding Tad Config is divided into 3 steps as Tax Configuration, Item Level Tax Details, and Header Level Tax Details.

In the first step, you need to fill in the required fields such as Tad Config Name, Trans Type Name, and Tax Combination, followed by clicking on the 'Next' button located at the bottom-right corner of the screen.
On this page, you can add tax details using the 'Add Tax Details' button at the bottom-right corner of the screen.
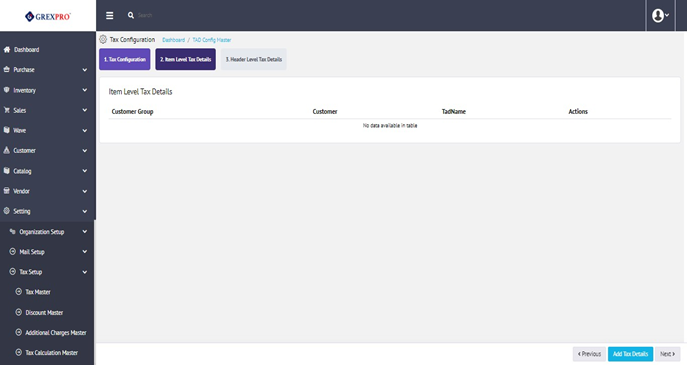
Click on the Add Tax Details button following with a pop-up will get open where you need to fill in the required information and click on the save button to move to the next step.
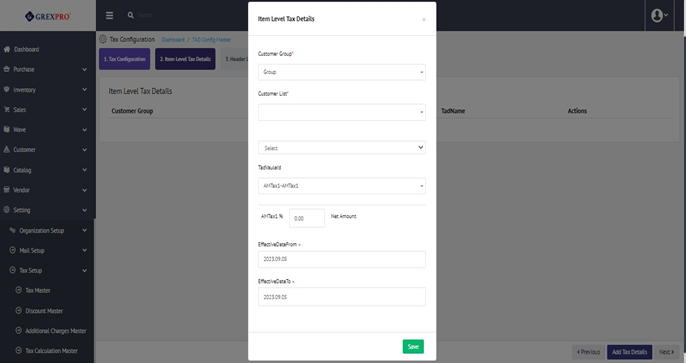
Click on the Next button to move to the last step.
On this page, you can add tax details using the 'Add Tax Details' button at the bottom-right corner of the screen.
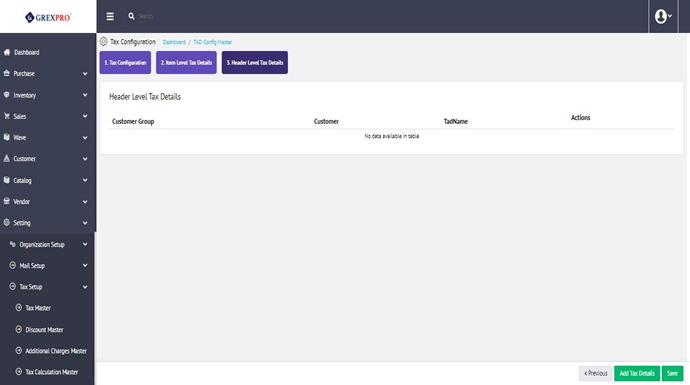
Click on the Add Tax Details button followed by which a ing pop-up will get open appear where you need to fill in the required information and click on the save button to move to the next step.

To complete the process, click on the Save button located at the bottom-right corner of the screen.
There are two ways to edit an entry, either click on the Tad Config Name or select an entry which you want to edit, click on the Action button located at the top-right corner of the screen and select Edit from the dropdown.
Rest of the process is the same as 9.3.6.1. Add however, you cannot edit a few fields.
The Delete option is only available for entries which are not interlinked with other modules of the system. To delete an entry, you need to select an entry and by clicking on the 'Action' button located at the top right corner of the screen, and then clicking on the 'Delete' option from the dropdown.
The Export button given at the right corner of the screen facilitates allows you to download a list of visible email categories.
General setup refers to various master data entities that are used in the application but are not directly connected to customers, vendors, or particular organization data. They are listed below.
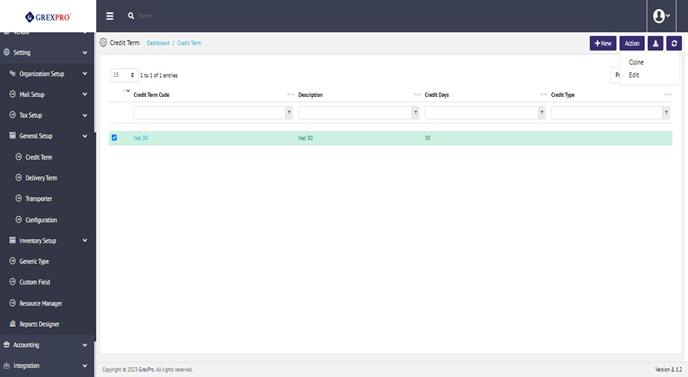
Credit terms are conditions applied to Sales Orders and/or Purchase Orders that define the amount of time within which a payment for the transaction may be made. Other conditions may also be specified along with a credit term and may be dependent on the organization or the vendor, depending on the transaction type.

To add a new Credit Term, you need to click on the 'New' button located at the top-right corner of the screen, which will open the following page where you need to provide the required information:

Click on the 'Save' button after filling in all the information.
There are two ways to edit an entry, either click on the Credit Term Code or select an entry which you want to edit, click on the Action button located at the top-right corner of the screen and select Edit from the dropdown.
The rest of the process is the same as 9.4.1.1. Add.
To clone any entity, select an entity from the list, then click on the 'Action' button located at the top-right corner of the screen and select 'Clone' from the dropdown.
Rest process is same The rest of the process is the same as 9.4.1.1. Add.
The Delete option is only available for entries which that are not interlinked with other modules of the system. To delete an entry, you need to select an entry and by clicking on the 'Action' button located at the top right corner of the screen, and then click on the 'Delete' option from the dropdown.
The Export button given at the right corner of the screen facilitates allows you to download a list of visible email categories.
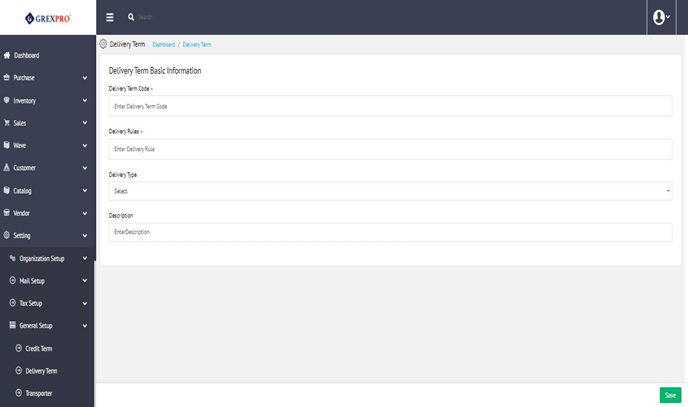
Delivery terms are conditions applied to Sales Orders and/or Purchase Orders that define the amount of time for delivery of a purchased or sold item. Other conditions may also be specified along with a delivery term and may be dependent on the organization or the vendor or the customer, depending on the transaction type.
To add a new Delivery Term, you need to click on the 'New' button located at the top-right corner of the screen which will open the following page where you need to provide the required information:
Click on the 'Save' button after filling in all the information.
There are two ways to edit an entry, either click on the Delivery Term Code or select an entry which you want to edit, click on the Action button located at the top-right corner of the screen and select Edit from the dropdown.

Rest process is The rest of the process is the same as 9.4.2.1. Add.
The Delete option is only available for entries which that are not interlinked with other modules of the system. To delete an entry, you need to select an entry. and Cclick on the 'Action' button located at the top right corner of the screen , and click on the 'Delete' option from the dropdown.
To clone any entity, select an entity from the list, then click on the 'Action' button located at the top-right corner of the screen and select 'Clone' from the dropdown.
Rest process is The rest of the process is the same as 9.4.2.1. Add.
The Export button given at the right corner of the screen facilitates allows you to download a list of visible email categories.
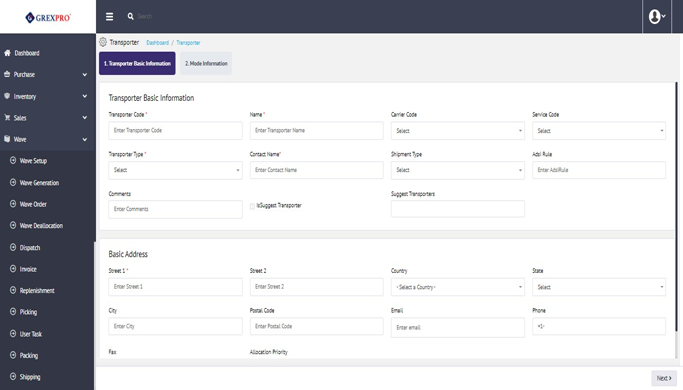
Transporters or shippers are the companies that provide transportation services to items being purchased and sold. Their information is necessary since there is often shipper information associated with Sales Orders and Purchase Orders, such as ASNs, airway bills, and other transportation documents.

To add a new Transporter, you need to click on the 'New' button located at the top-right corner of the screen which will open the following page. The process of adding new Transporter is divided into two steps: as Basic Information and Mode Information:
In the first step, you need to provide the basic information related to trasporter, including Transporter Code, Transporter Name, Contact Name, Shipment Type, Address, and other contact details. Click on the 'Next' button to move to the next step.
In the second step, you can select one or more modes of information.
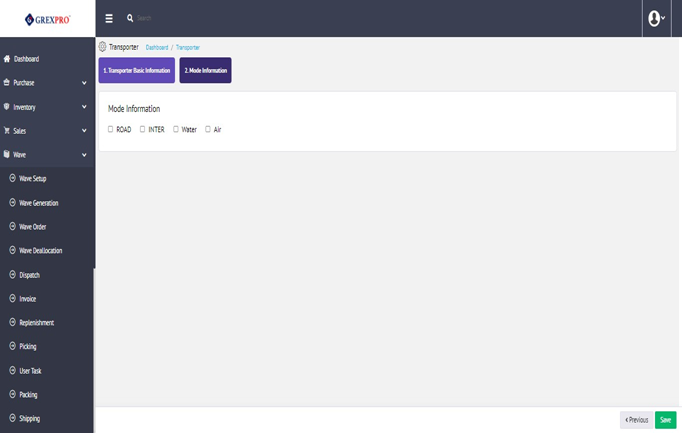
Click onthe 'Save' button to complete the process.
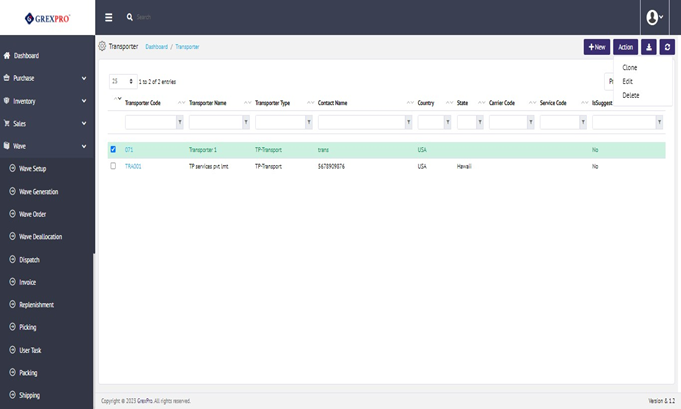
There are two ways to edit an entry, either click on the Transporter Code or select an entry which you want to edit., Cclick on the Action button located at the top-right corner of the screen and select Edit from the dropdown.
Rest process is The rest of the process is the same as 9.4.3.1. Add .
To clone any entity, select an entity from the list, then click on the 'Action' button located at the top-right corner of the screen, and select 'Clone' from the dropdown.
Rest process is The rest of the process is the same as 9.4.3.1. Add
The Delete option is only available for entries which that are not interlinked with other modules of the system. To delete an entry, you need to select an entry and click on the 'Action' button located at the top right corner of the screen, , and click on the 'Delete' option from the dropdown.
The Export button given at the right corner of the screen facilitates allows you to download a list of visible email categories.
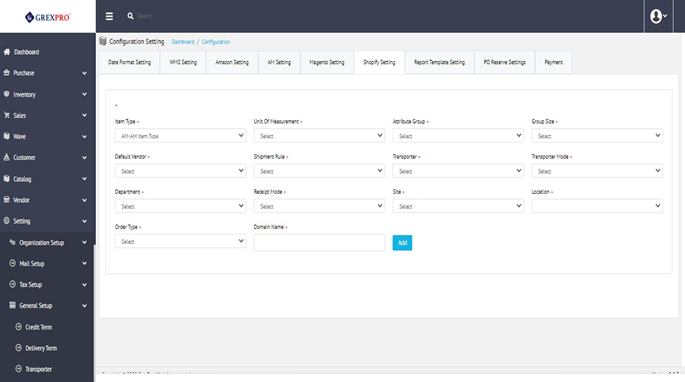
Here, you can change the date format and click on the Save button.

You can make changes to WMS from here and click on the Save button.

You can make changes to Amazon setting from here and save it by clicking on the Save button.

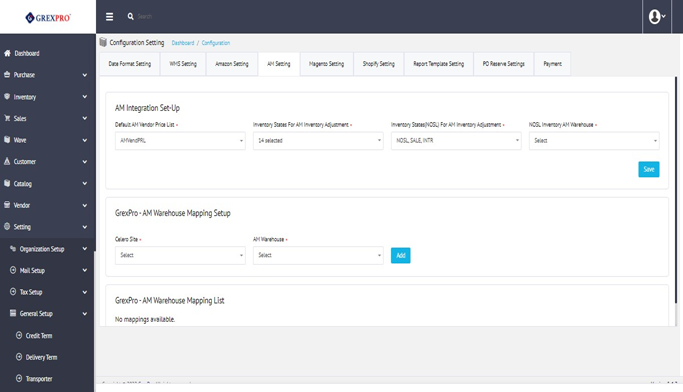
You can make changes to AM Integration setting from here and click on the Save button.
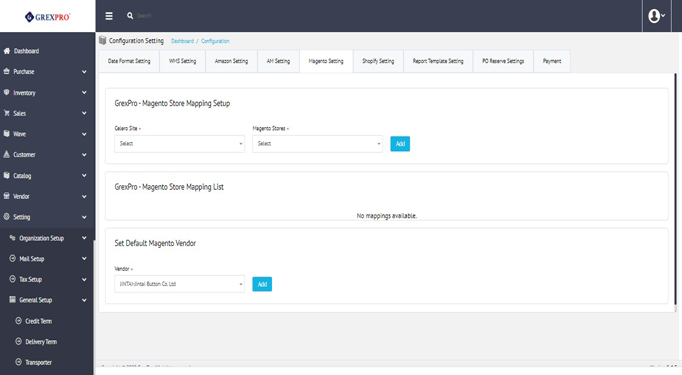
You can make changes to Magento Store setting from here and click on the Save button.
You can make changes to Shopify setting from here and click on the Save button.
You can make changes to the Report template setting from here and click on the Save button.

You can make changes to the Report template setting from here and click on the Save button.

You can make changes to the Report template setting from here and click on the Save button.

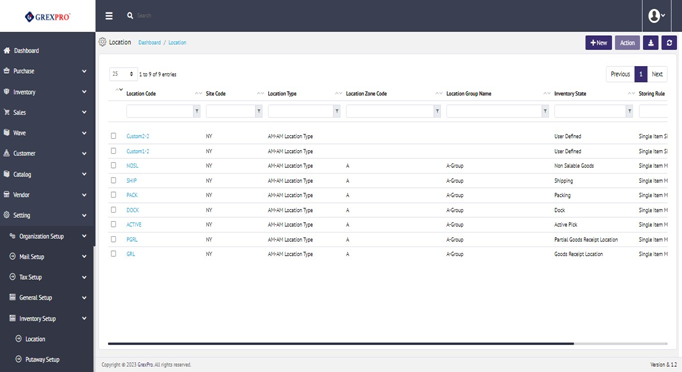
On the landing page, you can see a list of all the locations:
To add a new Location, you need to click on the 'New' button located at the top-right corner of the screen which will open the following page. The process of adding new Location is divided into two steps as Location Info and Specifications:
In the first step, you need to provide the basic information related to the location. Click on the 'Next' button to move to the next step.

In the second step, you need to provide specification.
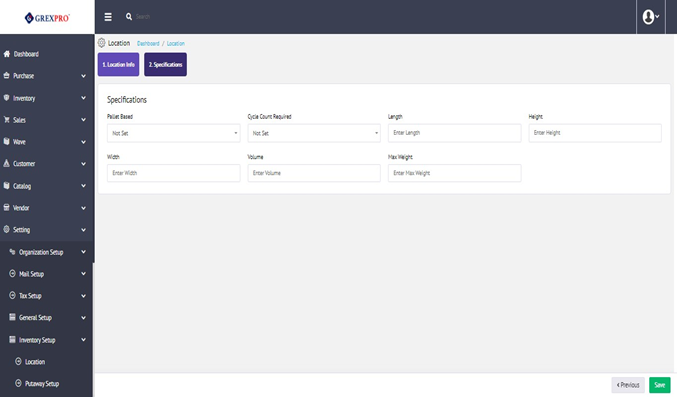
Click on the 'Save' button to complete the process.
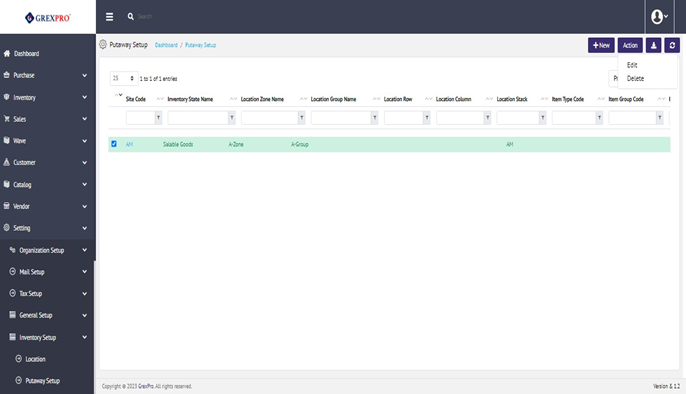
There are two ways to edit an entry, either click on the Location Code or select an entry which you want to edit, click on the Action button located at the top-right corner of the screen and select Edit from the dropdown.

Rest process is The rest of the process is the same as 9.5.1.1. Add.
To clone any entity, select an entity from the list then click on the 'Action' button located at the top-right corner of the screen and select 'Clone' from the dropdown.
Rest process is The rest of the process is the same as 9.5.1.1. Add.
The Delete option is only available for entries which are not interlinked with other modules of the system. To delete an entry, you need to select an entry and click on the 'Action' button located at the top right corner of the screen and click on the 'Delete' option from the dropdown.
The Export button given at the right corner of the screen facilitates allows you to download a list of visible email categories.
On the landing page, you can see a list of location zones:

To add new Location, you need to click on the 'New' button located at the top-right corner of the screen which will open the following page. The process of adding new Location zone is as follows:

Click on the 'Save' button to complete the process.
There are two ways to edit an entry, either click on the Site Code or select an entry which you want to edit, click on the Action button located at the top-right corner of the screen and select Edit from the dropdown.
Rest process is The rest of the process is the same as 9.5.2.1. Add .
The Delete option is only available for entries which that are not interlinked with other modules of the system. To delete an entry, you need to select an entry and click on the 'Action' button located at the top right corner of the screen, and click on the 'Delete' option from the dropdown.
To clone any entity, select an entity from the list, then click on the 'Action' button located at the top-right corner of the screen and select 'Clone' from the dropdown.
Rest process is s The rest of the process is the same as 9.5.2.1. Add .
The Export button given at the right corner of the screen facilitates allows you to download a list of visible email categories.
To add new Packing, you need to click on the 'New' button located at the top-right corner of the screen which will open the following page where you need to provide the required information:
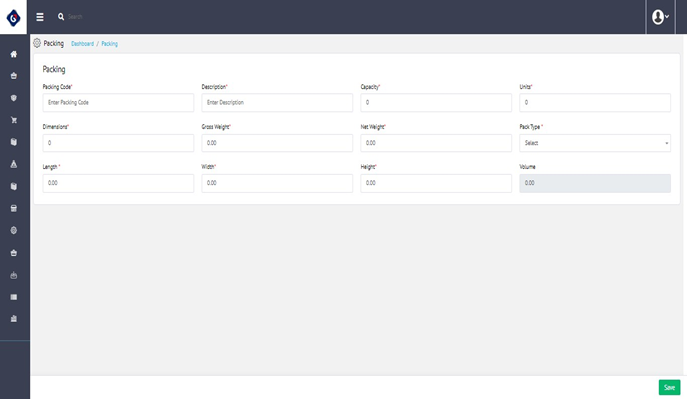
Click on the 'Save' button after filling in all the information.
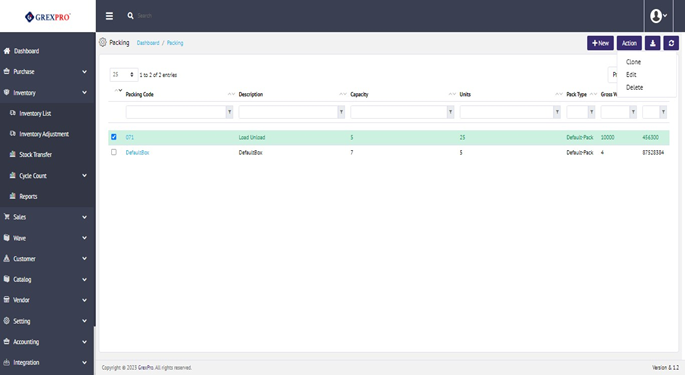
There are two ways to edit an entry, either click on the Packing Code or select an entry which that you want to edit, click on the Action button located at the top-right corner of the screen and select Edit from the dropdown.
Rest process is The rest of the process is the same as 9.5.3.1. Add .
The Delete option is only available for entries which that are not interlinked with other modules of the system. To delete an entry, you need to select an entry and click on the 'Action' button located at the top right corner of the screen, and click on the 'Delete' option from the dropdown.
To clone any entity, select an entity from the list, then click on the 'Action' button located at the top-right corner of the screen and select 'Clone' from the dropdown.
Rest process is The rest of the process is the same as 9.5.3.1. Add.
The Export button given at the right corner of the screen facilitates allows you to download a list of visible email categories.
You can create your own customized list for fields listed in various functionalities including Credit Terms, Customer Master, Delivery Terms, Financial Entity, Location Master, Packing, Purchase Order, Receiving, Sales Order, Sites, Transporter, and Vendor Master. The fields for which you can generate a customized dropdown list are Credit Type, Customer Category, Customer Type, Delivery Type, Financial Entity Type, Location Group, Location Type, Location Zone, Pack Type, Receipt Mode, Receipt Mode, Receipt Type, Release Type, Sales Order Type, Sales Return Type, Shipment Type, Site Type, Transaction Type, Transporter Type, Vendor Category, and Vendor Type.
Here, you can see a list of all created generic types, which can be edited, cloned, and deleted depending upon some conditions.
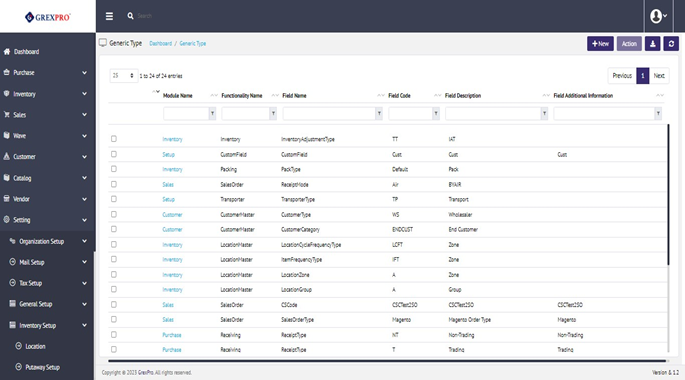
To create a new generic list, click on the a New button located at the top-right corner of Generic Type List, which will lead you to the following screen. Here, by filling in some mandatory information you can create a new type for any fields.

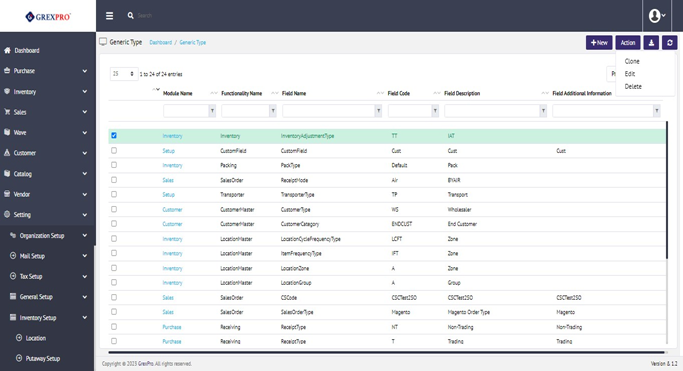
You can edit and update information of the existing Generic Type by clicking on the 'Module Name' from the Generic Type List. Another way to edit Generic Type information is by selecting a specific entity and clicking on the 'Action' button located at top right corner of the screen. This will open a dropdown and you need to click on the Edit option from the dropdown:
Rest process is The rest of the process is the same as 9.6.1. Add.
To clone any entity, select an entity from the list then click on the 'Action' button located at the top-right corner of the screen and select 'Clone' from the dropdown.
Rest process is The rest of the process is the same as 9.6.1. Add.
The Delete option is only available for entries which that are not interlinked with other modules of the system. To delete an entry, you need to select an entry and click on the 'Action' button located at the top right corner of the screen, and click on the 'Delete' option from the dropdown.
The Export button given at the right corner of the screen facilitates allows you to download a list of visible email categories.
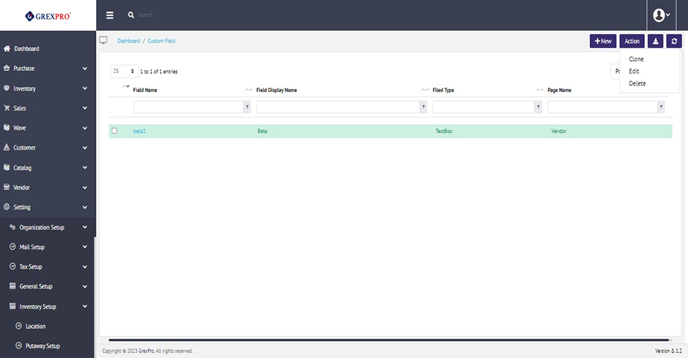
In custom fields you can add any field name you want to create, following with, the field display name, field type, and class.
To create a new custom list, click on the a New button located at the top-right corner of Custom Field List, which will lead you to the following screen. Here, by filling in some mandatory information you can create a new type for any fields.

Once done you can click on the Save button.
You can edit and update information of the existing custom field by clicking on the 'Field Name' from the custom field list. Another way to edit custom type information is by selecting a specific entity and clicking on the 'Action' button located at top right corner of the screen. This will open a dropdown and you need to click on the Edit option from the dropdown:
Rest The rest of the process is the same as 9.7.1. Add.
To clone any entity, select an entity from the list then click on the 'Action' button located at the top-right corner of the screen, and select 'Clone' from the dropdown.
Rest process is The rest of the process is the same as 9.7.1. Add.
The Delete option is only available for entries which that are not interlinked with other modules of the system. To delete an entry, you need to select an entry and click on the 'Action' button located at the top right corner of the screen, and click on the 'Delete' option from the dropdown.
The Export button given at the right corner of the screen facilitates allows you to download a list of visible email categories.
You can manage your resource UI for fields listed in various functionalities including CatalogUI, CustomerUI, PurchaseUI, IdentityUI, InventoryUI, ReportUI, SalesOrderUI, SettingsUI, and VendorUI.

When you select the required UI, its resource name, default value, and custom value will be displayed where you can fill out the Custom Values and click on the 'Save' or 'Cancel' button.
Clicking on the option Report Designer, it will take you to the following screen where you can see a button for "Create New Template". After clicking on that button, you can see the following pop-up:


Here, you need to select Module, Table Source and give Template Name. Also, if you wish you can select the multiple filters from the dropdown. Once selected all fields, you need to click on the Run button available at the bottom-right corner of the pop-up window.