Purchase Receipt, Put Away, and Prepack Put Away are the three processes that come under inbound receiving module.
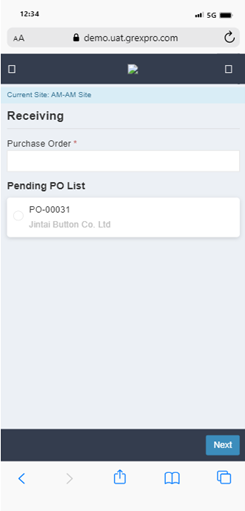
You have to select a site form i.e., AM-AM Site, NY-NY Site or other available site from the drop-down section.

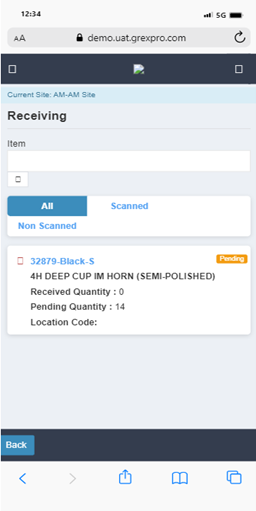
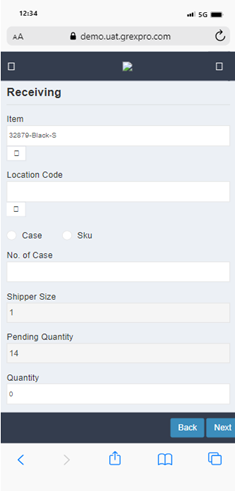
Here, you can perform the receiving operation, which is divided into two. First, you need to select the PO from the list or directly add the PO number in the search box, followed by clicking the Next button, which will take you to the next screen. In the next screen, you need to select an item that you want to scan. After filling in the required details, click Next to generate the receipt.
Put away is a process of moving a product from the receiving location to the most appropriate location. There are four ways (Purchase Order, Location, Pallet No, and Item) to perform the Put Away operation.
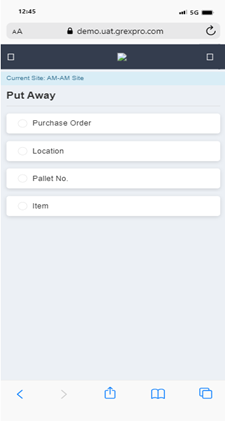
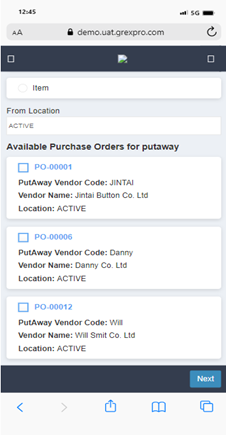
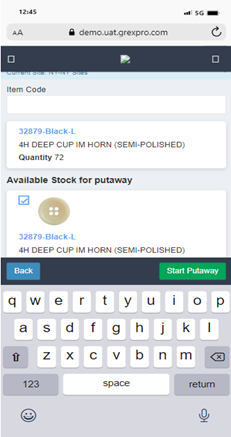
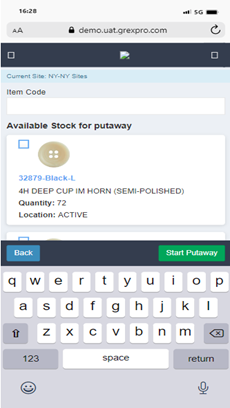
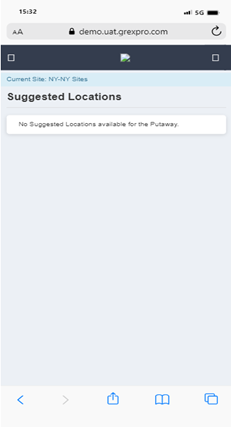
To perform Put Away using PO, you need to select Purchase Order, followed by entering the location in the text box. Here, you can see a list of all the POs available at that particular location; you can select an order for which you want to perform the Put Away operation and click the Next button. In the next screen you can see a list of items in selected PO, select items and click on the Start Put Away button to move to the next screen. To scan an item, you need to enter an item code in the text box, which will lead you to the next screen, where you need to enter the Put Away location and click the Done button to move to the next step. Click the Finish Put Away button to complete the process.

To perform Put Away using Location, you need to select Location, followed by entering location in the text box. Here, you can see a list of all POs available at that particular location; you can select an order for which you want to perform Put Away operation and click on Next button. In the next screen you can see a list of items in selected PO, select items and click on Start Put Away button to move to the next screen. To scan an item you need to enter an item code in the text box, which will lead you to the next screen where you need to enter put away location and click on Done button to move to next step. Click on the Finish Put Away button to complete the process.

To perform Put Away using Item, you need to select Item, followed by entering location in the text box. Here you can see a list of all items available at that particular location; you can select an order for which you want to perform Put Away operation and click on Start Put Away button to move to the next screen. To scan an item you need to enter an item code in the text box, which will lead you to the next screen where you need to enter put away location and click on Done button to move to next step. Click on the Finish Put Away button to complete the process.


Prepack Stock Transfer, Prepack Warehouse Transfer, and Cycle Count are the three processes that come under scan inventory module.
You have to select a site form i.e., AM-AM Site, NY-NY Site or other available site from the drop-down section.
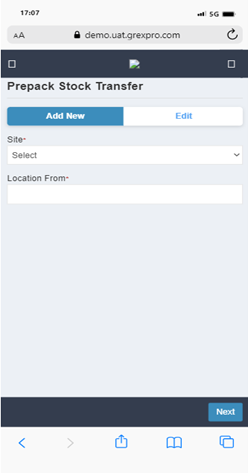
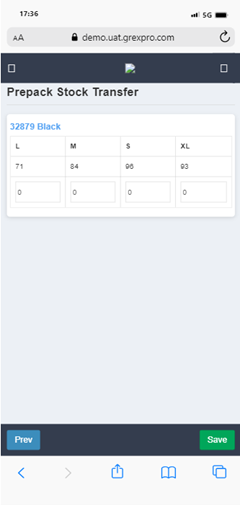
To perform Prepack Stock Transfer, you need to select Site, followed by entering location in the text box. Here you can see a list of all stocks available at that particular location; you can select an order for which you want to perform Stock Transfer operation and click on Next button. In the next screen you can see a list of items in selected Stock, put number of items you need to transfer of that stock and click on Save button. The Stock transfer will be updated successfully.

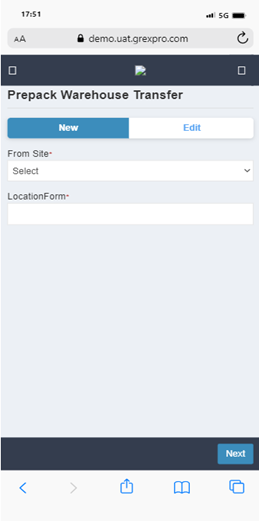
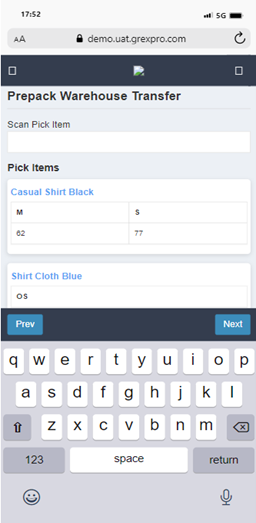
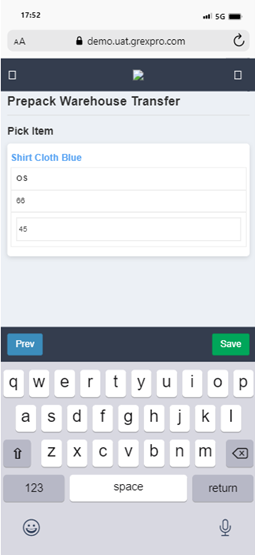
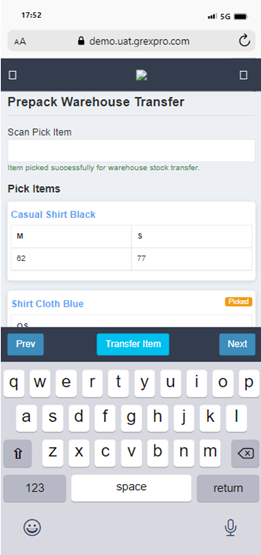
To perform Prepack Warehouse Transfer, you need to select Site, followed by entering location in the text box. Here you can see a list of all stocks available at that particular location; you can select an order for which you want to perform Warehouse Stock Transfer operation and click on Next button. In the next screen you can see a list of items in selected Stock, put number of items you need to transfer of that stock and click on Save button. The warehouse transfer stock will be updated successfully.
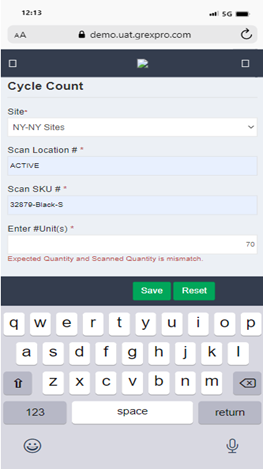
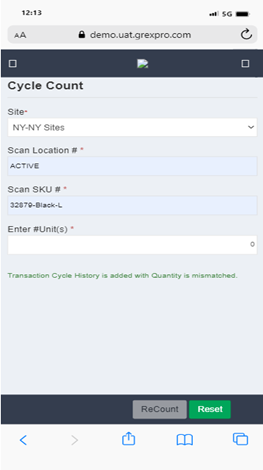
Cycle Count confirms physical inventory counts to match their inventory records. To perform cycle count process, you need to select Site, followed by entering Scan location in the text box and Scan SKU and number of unit of that Item and click on Save button. Transaction count history and quantity will be counted and saved.
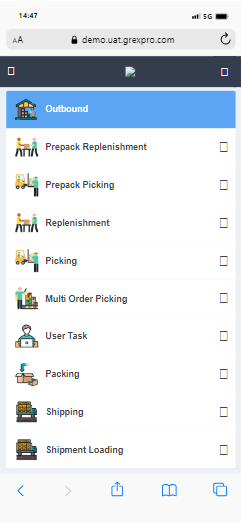
The outbound processes include:-
To start the process, you need to have Replenishment Ticket No (Printed Label). In the first screen, you need to enter/scan the ticket number followed by Next button which will take you to the next screen. In the second screen you need to enter/scan the item code and click on Next to perform Replenishment. In the next step, you need to enter/scan the location from where items needs to be picked followed by clicking on Save button. The next step is to enter/scan the located where items need to be dropped. For this, you need to click on Put Item button which will take you to screen 5 where you need to enter/scan the item code that needs to be replenished. Need to click on Next button which will take you to next step where you need to enter/scan location where items need to be delivered, click on the Save button to complete the process. Repeat the same process for other items.