Here, you can see all details related to inventory available in the warehouse, including physical stock qty, allocation qty, and hold qty available to sell qty and inventory cost.
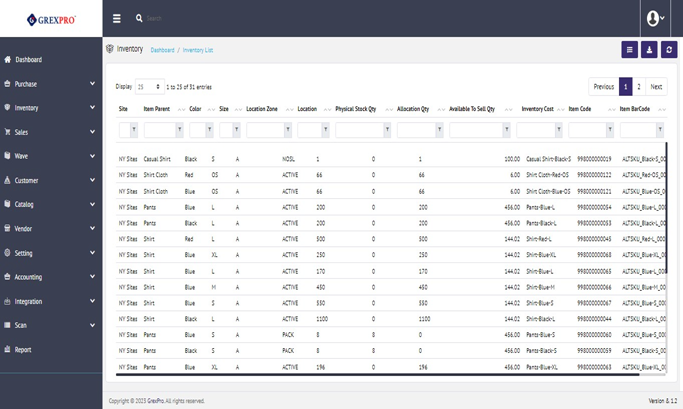
The Export button given at the bottom centre of the screen facilitates you to download a list of visible inventories.
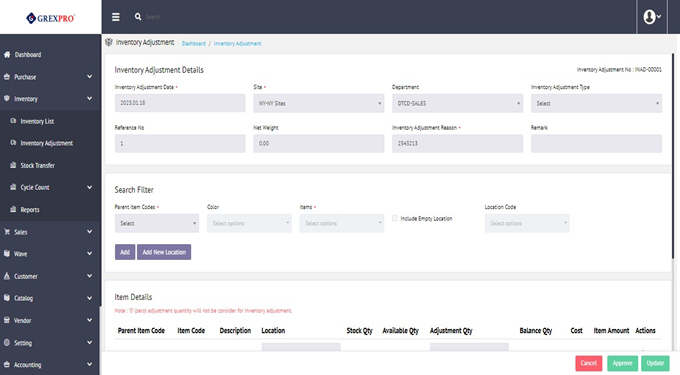
On the landing page, you can see a list of inventory adjustment entries.

To add new inventory adjustment, click on the New button located at the top-right corner of the screen, that which will lead you to the following page:

Site, parent item code, items, and Inventory Adjustment Reason are mandatory fields. After filling in all the required details, click on the Save button which will save the item details and complete the process.
There are two ways to edit an Inventory Adjustment, either click on the Inventory Adjustment No or select an entry which you want to edit, click on the Action button located at the top-right corner of the screen and select Edit from the dropdown.
Rest of the process is the same as adding Inventory Adjustment.
There are two ways to approve an Inventory Adjustment:, either Sselect an entry which you want to approve, click on the Action button located at the top-right corner of the screen and select Approve from the dropdown.
Secondly,Or, you can go on the edit page where you can see an the Approve button at the bottom-right corner of the screen. Click on the Approve button to approve the adjustment.
To delete an Inventory Adjustment, select an entry, click on the Action button located at the top-right corner of the screen, and select the Delete option from the dropdown list. This option is only available for unapproved entries.
To view Inventory Adjustment, select an entry, click on the Action button located at the top-right corner of the screen and select the View option from the dropdown list.
The Export button given at the bottom centre of the screen facilitates you to download a list of visible Inventory Adjustments.
On the landing page you can see a complete list of stock transfer.
In order to add new stock transfer entry, click on the New button located at the top-right corner of the screen that will lead you to the following page:
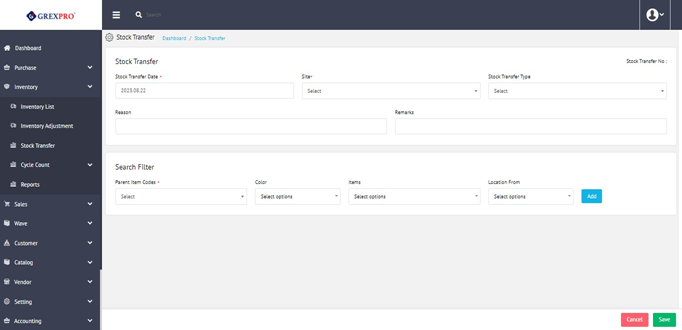
Stock transfer date, Site, parent item code, and items are mandatory fields. After filling in all the required details, click on the Save button to complete the process.
There are two ways to edit a Stock Transfer entry:, either Cclick on the Stock Transfer No or select an entry which you want to edit, click on the Action button located at the top-right corner of the screen and select Edit from the dropdown.
Rest process is the same as adding Stock Transfer.
To delete a Stock Transfer entry, select an entry, click on the Action button located at the top-right corner of the screen, and select the Delete option from the dropdown list. This option is only available for unapproved entries.
There are two ways to approve Stock Transfer:, either select an entry which that you want to approve, click on the Action button located at the top-right corner of the screen, and select Approve from the dropdown.
Or you can go on the edit page where you can see an Approve button at the bottom-right corner of the screen. Click on the Approve button to approve the adjustment.
To view Stock Transfer Entry, select an entry, click on the Action button located at the top-right corner of the screen and select View option from the dropdown list.
The Export button given at the bottom centre of the screen facilitates you to download a list of visible Stock Transfer entries.
By default, there are three reporting templates naming named: Historical Inventory Availability by Date, Historical Inventory Availability by Date, and Inventory Report. These templates cannot be edited or deleted. If, apart from these three reports, you want to create a customized report, you can clone any of the existing one by clicking on the 'Clone' icon and giving a unique name to the template.
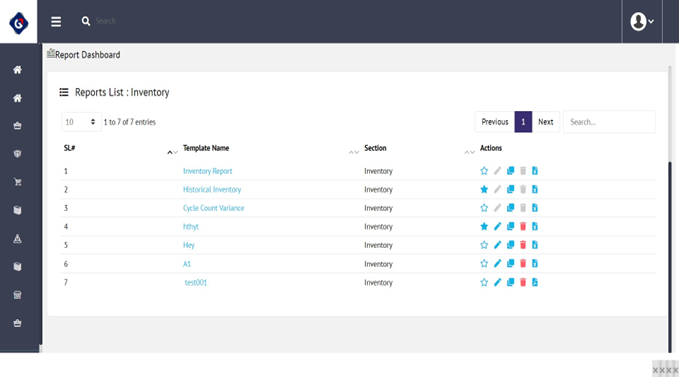
Reports created by users can be edited or deleted at any point of in time. To edit or generate a new report, you need to gain an understanding about of 'dev-express.''.