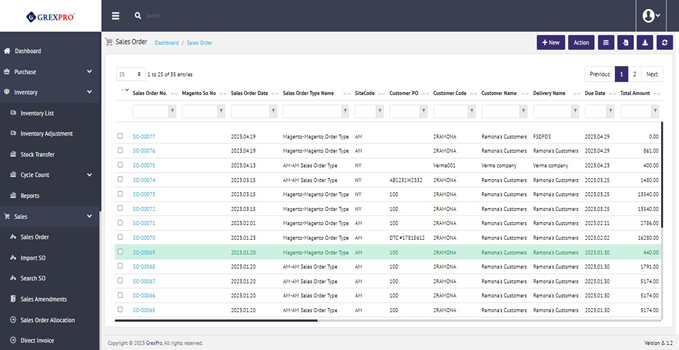
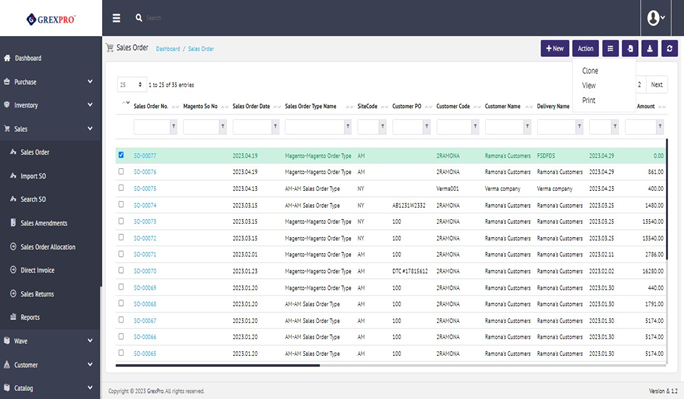
You can access this page by clicking on the Sales Order link listed under the 'Sales' collapsible menu. Here you can see the list of all Sales Orders:
The process of adding a Sales Order is divided into four steps as Sales Order, Sales Order Items, Sales Order Summary, and Sales Order Status. To add a new SO, click on the 'New' button located at the top-right corner of the sales order list. This activity shall navigate to the following screen, which is the first step:
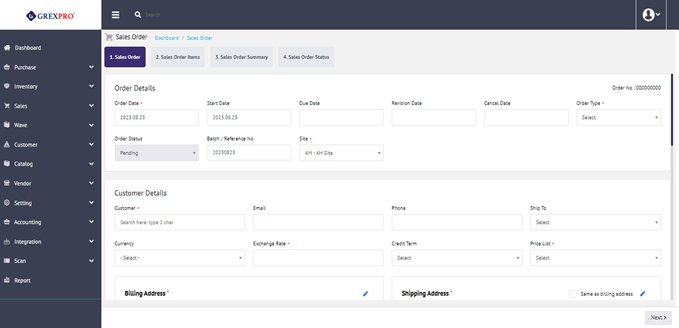

Customer, site, price list, billing, shipping address, and shipment rule are mandatory fields, which need to be filled before moving to the next step. After providing all the required fields, you need to click on the 'Next' button located at the bottom-right corner of the screen.
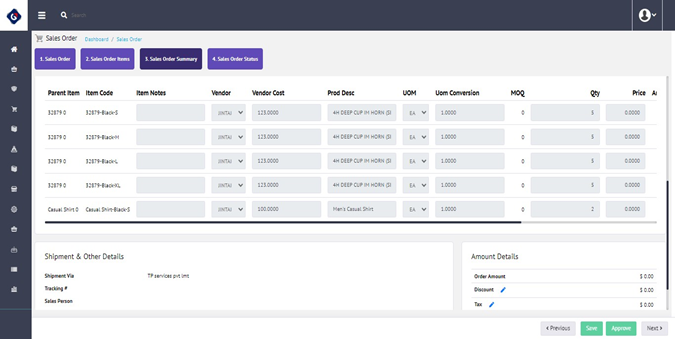
In the next step, you can add multiple items in SO. Select an item from the dropdown, which will open a box where you can add quantity and cost as below:

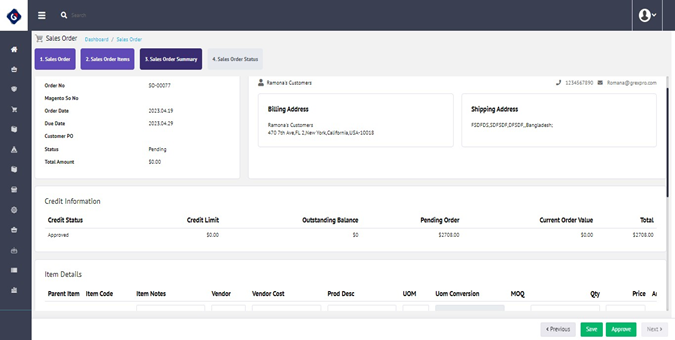
Before moving to the next step, you need to save the SO using a 'Save' button located at the bottom-right corner. Click on the Save button, and you will be redirected to the third step, which is Sale Order Summary. You can change to the SO before approving it using the 'Previous' button located at the bottom-right corner; once approved, you cannot make changes to SO. To approve SO, click on the 'Approve' button placed next to the 'Previous' button.
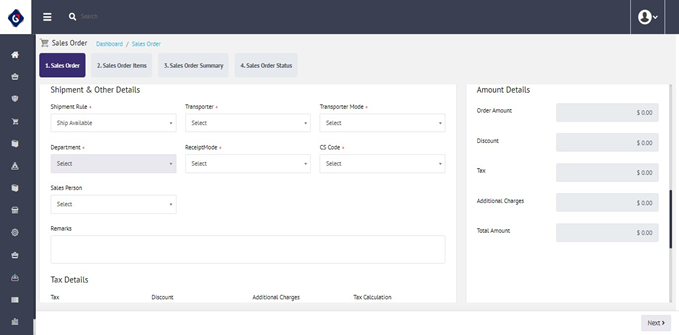
Shipping details section and Amount details section hidden in the above images are shown in the image below.
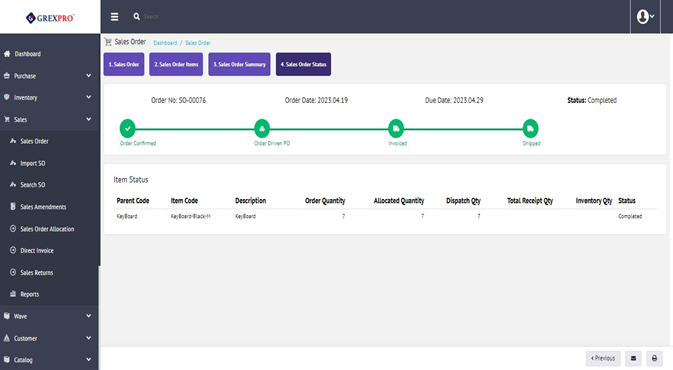
Without approving, you cannot move to the next step. The next step is Sales Order Status, where you can see the status of that sales order. When the SO follows direct invoicing workflow, then the SO status looks like the below image where the SO status displays:
Order Confirmed, Order Driven PO, Invoicing, and then Shipped, as shown below.
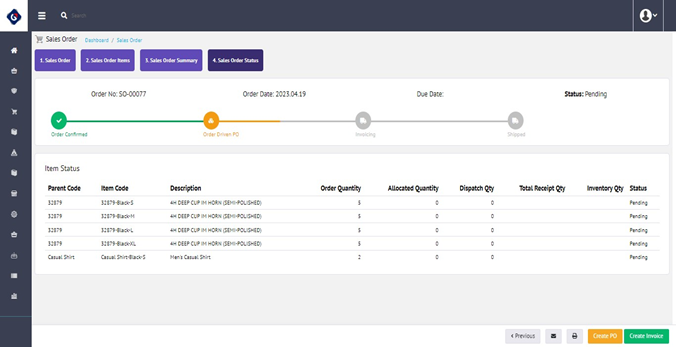
On this screen of SO status, users can have following functionality:
Create PO for items in this SO. This feature leads to an Order driven PO screen and provides all items selected from this SO.


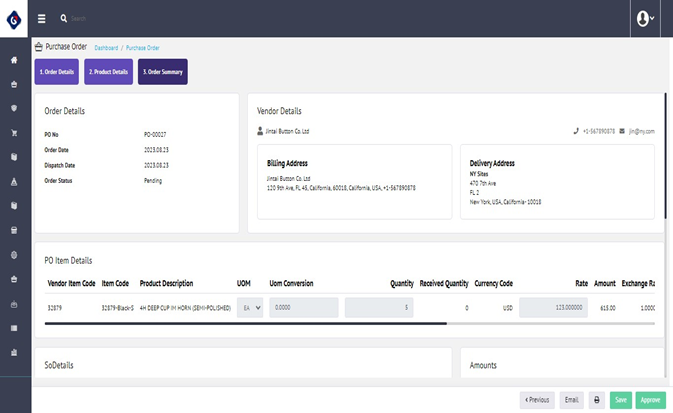
Once the PO is created for this SO, then the SO Status page looks like this and displays/lists the POs created for this SO as below. The user can track very easily that which PO is to receive for dispatching this SO. And after this the Create PO button gets hidden as well.
Creating ane iInvoice directly after creating SO is given to skip wave workflow and ship the items, reducinge the stock. Once the invoice is generated for the SO, it can get listed on the Direct Invoice list page.

There is a Save button in the Ccreate Ddirect Iinvoice screen, by which the user can ship the selected items only. All items at once can be selected by clicking the checkbox at the top left area ofn the item detail section. If the user wants to use the Ship All button to select all the items.

The next screen after clicking the save button is shown below.
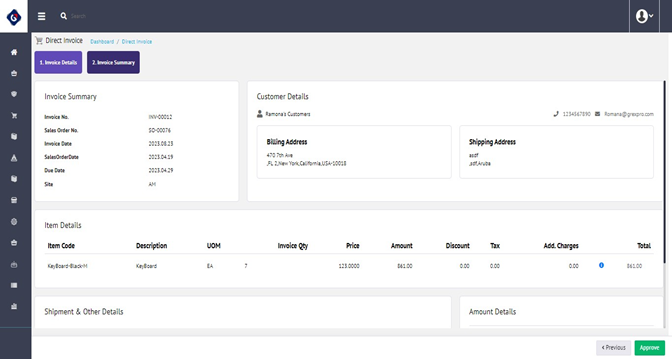
On click of the Approve button, the system asks for confirmation. If a user says 'Yes', it proceeds and creates an invoice and then redirects to the Direct invoice list page where the newly created invoice can be seen.

After the invoice is created,ad , item shipped, the SO status looks like the below, which shows all stages completed and presenteds in Green.
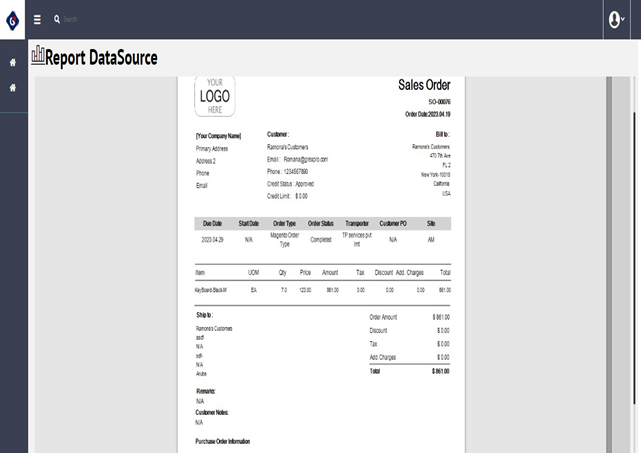
By using the Print button, the user can go to the report page where the user can have the feature to print directly or can download in PDF, Excel, CSV, image.
The output report looks like as shown in the below image:
With an Email button at the bottom-right corner of the screen, you can send a SO to the customer.
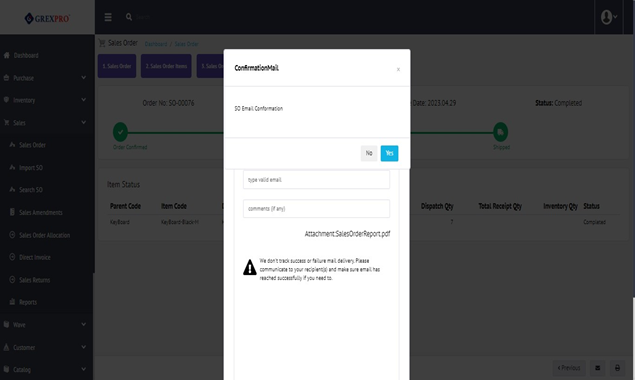
User can add multiple additional recipients (separated by comma) for this mail other than, which is set as default recipient from the configuration. Users can also add some notes in the cComments area, which will be appended in the mail body.
By clicking theOn click of Send button, mail will be sent to all recipients.
You cannot edit the approved SO, but you can view it. If the SO is pending for approval, you can edit it in two different ways:; either click on the Sales Order Number link or select the entity., cclick on the Action button located at the top-reight corner and select Edit from the dropdown.
Rest process is the same as adding Sales Order.
If the SO is approved, then you can see View option in the Action's dropdown.
Select the specific entry that you want to clone, click on the 'Action' button located at the top-right corner of the screen and select the 'Clone' option from the list.
There are two ways to approve Sales Orders. Visit the Edit page and click on the Approve button at the bottom-right corner or select entry, click on the Action button, and select the Approve link from the dropdown. A pop-up will appear to confirm once you click on Yes. Your SO will get approved.
The application facilitates you to cancel the order if its status is Pending or Partial Shipped. In order to cancel any order, select the entity, click on the Action button on the top-right corner of the screen, and click on the Cancel option from the dropdown. This option is available for approved SO only.
You can delete the SO entry, which that are not approved. Simply select an entry to delete, click on the Action button on the top-right corner and select the Delete option from the dropdown. It will open a confirmation pop-up, as soon as you click on Yes, it will get deleted from the list.
Simply by clicking on the 'Import' button placed at the bottom centre of the page, you can import details of SOs from the integrated website.
The Export button given at the bottom centre of the screen facilitates you to download a list of Vvisible Sales Orders.
Import from CSV is a feature by which offer the user can to import Sales Order data into to the Grexpro system from data saved into CSV format file.
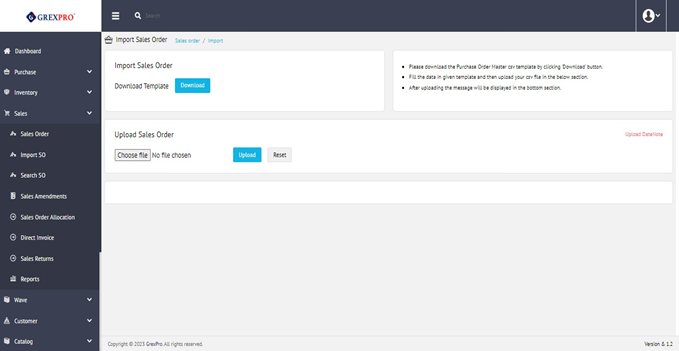
To import the data, the first user needs to download the template created for the process. To download the template for Sales Order can use the "Download" button.
After downloading user needs to fill in the data in the given format and then try to upload the file by using the "Choose file" option in the upload area. Once the file is chosen, the user can click the upload button, and then the data uploading process starts.
If an Error comes occurs in the validation or data syncing process during data integration, the log creates displayed in Log section. User can check each record error and after correction, it can be uploaded again.
If all the data gets successfully uploaded successfully, the system will still display then also log. displayed. by the system.
Logs displayed can be cleared by the "Reset" button in the Upload section can be used to clear the displayed Logs..

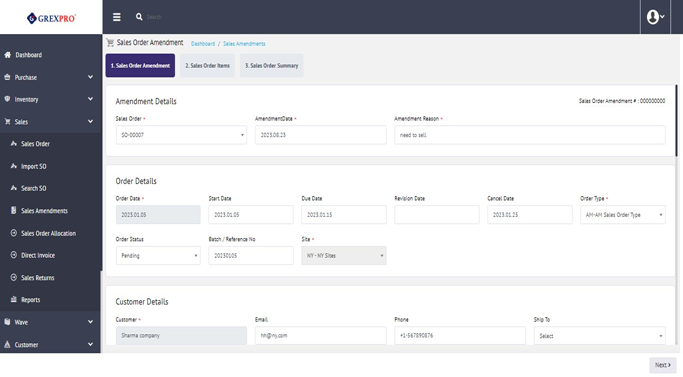
In order to add a new Sales Order Amendment entry, you have to click on the New button available at on the landing page. The process is divided into three parts, described as follows.:
In the first stage, you have to select the sales order for which you need the the amendment, date, and reason for amendment.

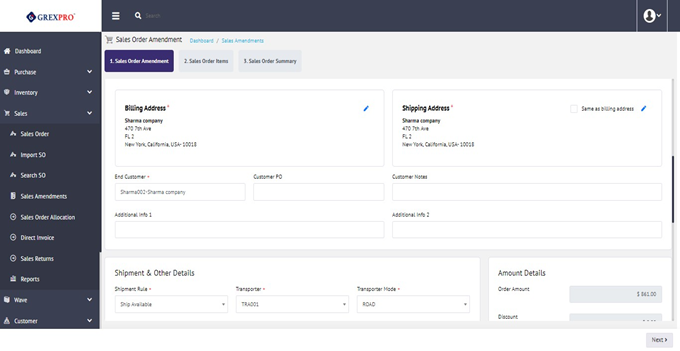
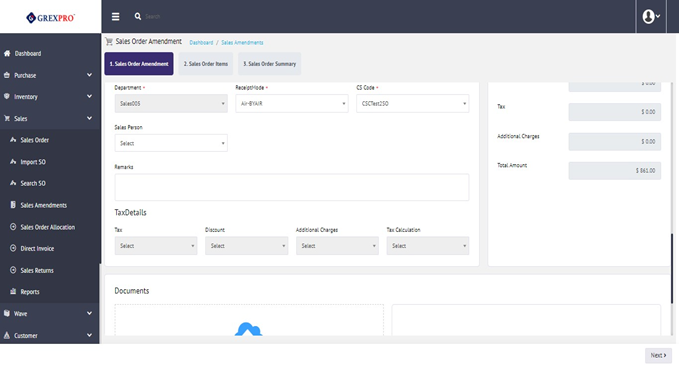
After selecting a sales order for the amendment, theis following page will open, where you can see a Next button at the bottom-right corner. Click on that button which shall navigate to the next page.

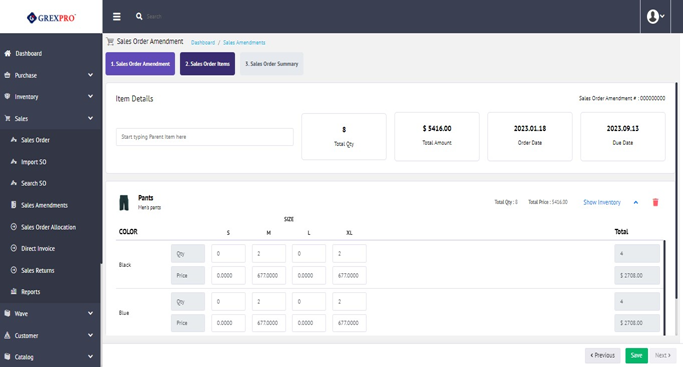
In the second step, you can make changes such as adding and removing items, modifying the item quantity, etc. Once done, you need to click the Save button to move on to the next step.
On the last page, you can see the summary where you can make changes if required and click the Approve button available at the bottom right corner to complete the process.


This option allows previewing of the approved entries. To view, you need to select an entry and choose the View option from the Action dropdown.
This option is only available for unapproved entries. You can either click the Sales Order Amendments directly or select an entry and choose the Edit option from the Action dropdown available at the top-right corner of the screen.
The rest of the process is the same as 4.3.1. Add .
There are two ways to approve an entry. The first option is to select an entry and choose the Approve option from the Action dropdown. The second one, on the other hand, and the second way is to edit the entry and click the Approve button available at on the Summary page.
This option is only available for unapproved entries. To delete an entry, you need to select an entry and choose the Delete option from the Action dropdown available at the top-right corner of the screen.
The Export button given at the bottom centre of the screen facilitates you to download a list of visible Sales Order Amendment entries.
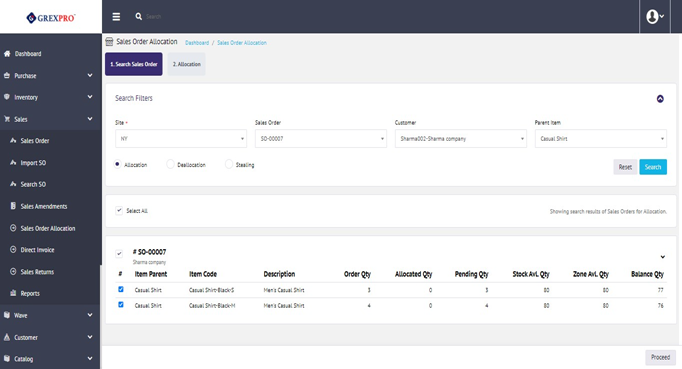
Allocation is the process by which products included in approved Sales Orders are reserved so that they may be picked, packed, and shipped. Allocated products are included in Wave Generation. On the landing page, you need to select the site and click the Search button, which will open a list of sales orders.
Click Search to see a list of items on that site. Simply select items and click on the 'Confirm' button.
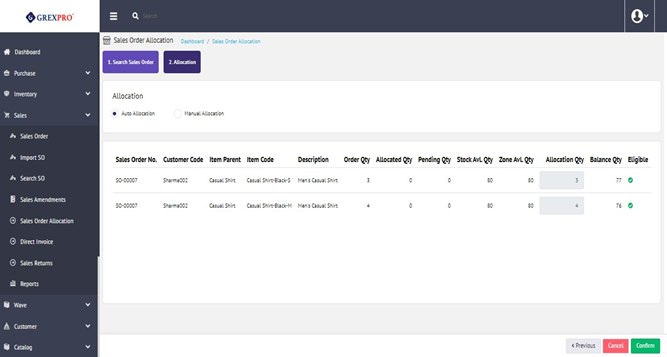
There are two options for allocation: Auto and Manual. If you select Auto Allocation system, it will allocate item quantity for the order. For and for Manual Allocation, you can manually allocate the item quantity. Once the allocation is done, click the Confirm button to finish the process. You can also make changes using the Previous button.
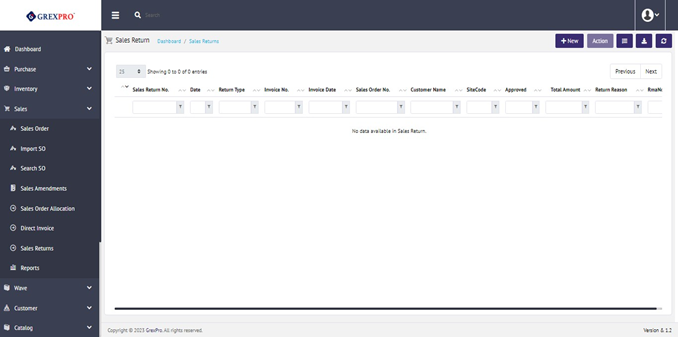
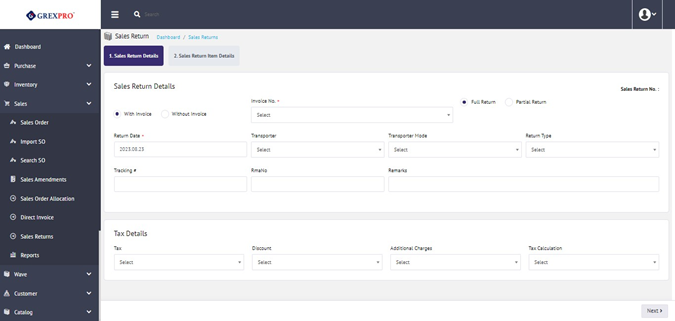
To add a new Sales Order, you need to click the 'New' button located at the top-right corner of the screen, which will lead you to the following screen. Select the invoice number for which you want to generate the Sales Return:
After selecting an the Invoice Number, you can see complete entire details about that invoice.
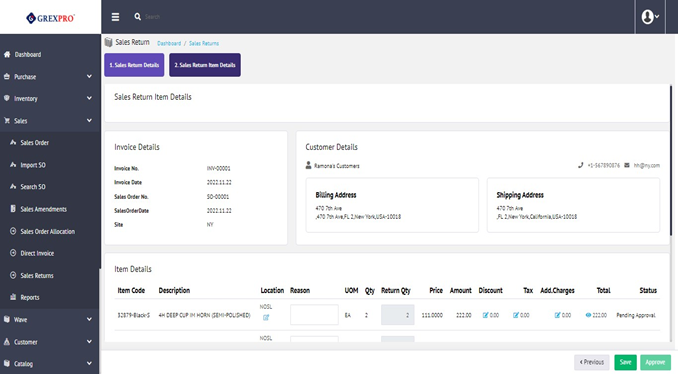
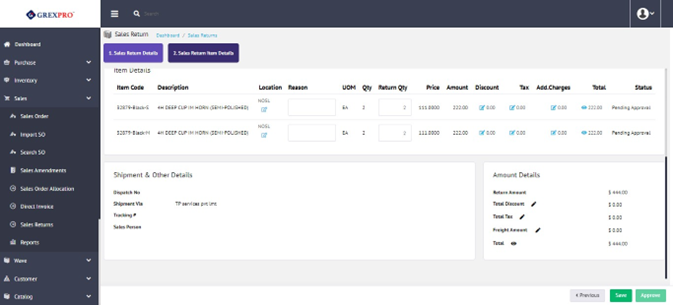
You need to provide Return Location and Return Reason, followed by the Save button to complete the process.
You cannot edit the approve Sales Return, but you can view it. If the sales return is pending for approval, you can edit it in two different ways; click the Sales Return Number link or select the entity, click the Action button located at the top-eight corner and select Edit from the dropdown.
Rest of the process is the same as 4.1.1. Add .
If the sales return is already approved, then you will have an option for View in the Action's dropdown.
There are two ways to approve a Sales Return. Visit the Edit page and click the Approve button at the bottom-right corner or select entry, click the Action button, and select the Approve link from dropdown. Once you will click yes, aA pop-up will appear to confirm, once you click Yes, and entry will get approved.
You can delete entry, which are not approved. Simply select an entry that you want to delete, click the Action button on the top-right corner and select the Delete option from the dropdown. It will open a confirmation pop-up, as soon as you click Yes, it will get deleted from the list.
The Export button given at the bottom centre of the screen facilitates you to download a list of the visible Sales Returns.
By default, there are five reporting templates available: Customer Sales Analysis, Customer Sales Analysis Details, Sales Order Fulfilment Report, Sales Order Register, and Sales Order Register-Detail, which are non-editable and cannot be deleted. If you are looking to create a customized report, you can clone any of the existing ones by a clicking theto 'Clone' link and giving a unique name to the template.
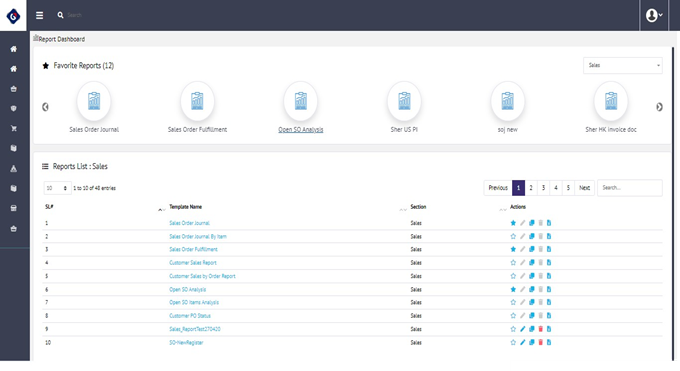
Reports created by users can be edited or deleted at any point of in the time.