The Customers module stores information about external buyers of items that ship out of warehouse sites. They may be classified by category and type. Customers raise sales orders through which sales are made, and inventory is shipped from the warehouse. They may have price lists associated with them. Customers also may have multiple addresses and contacts.
This offers a list of customers where you can find basic information about customers, including name, customer type, address, email id, and contact number.

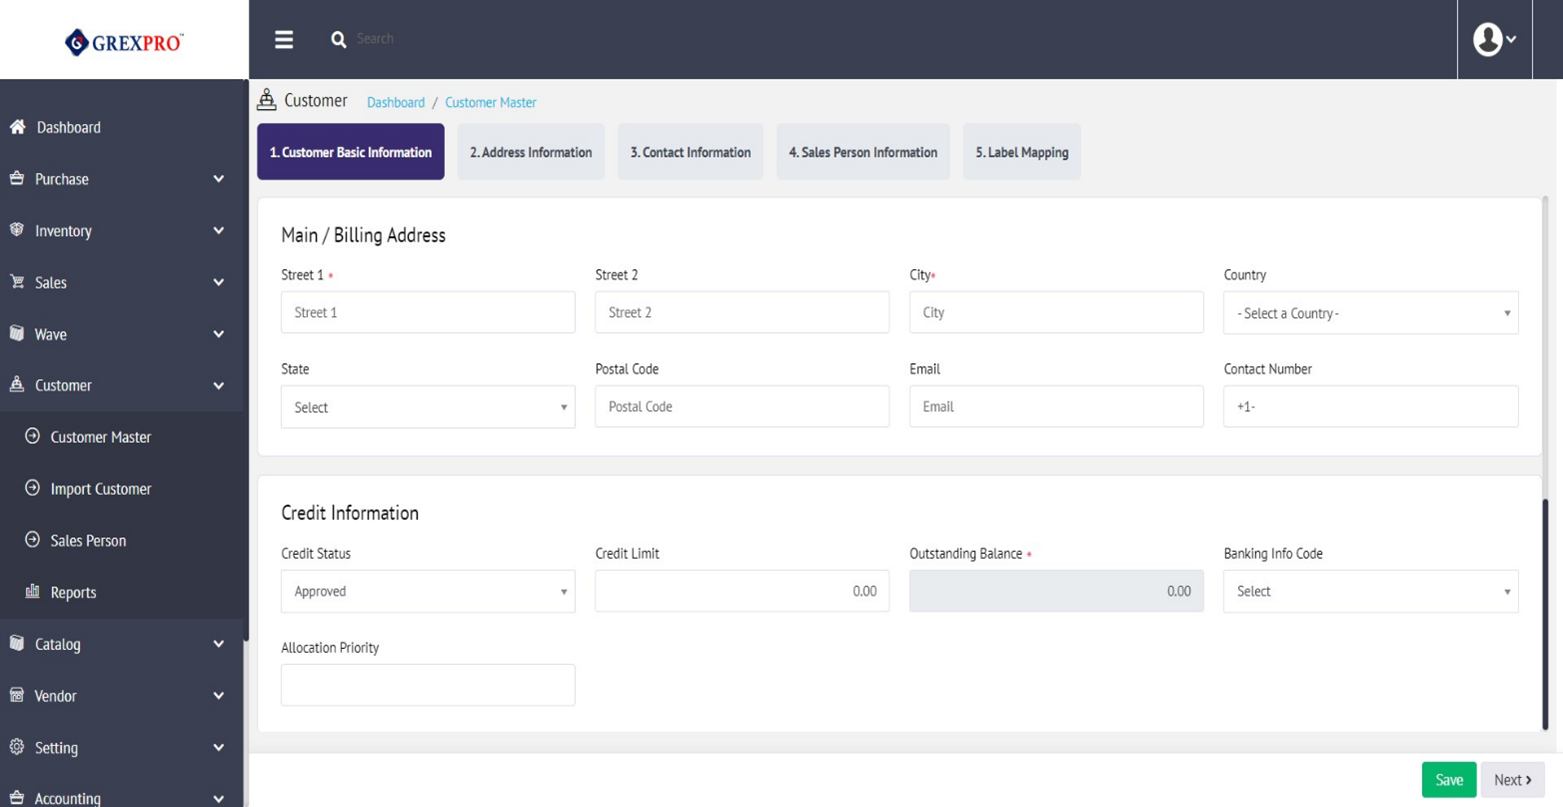
You can also add a new customer using the 'New' button located at the top right corner of the screen. The process of adding a customer is divided into four steps. After clicking the 'New' button, you will land on the following page, where you need to provide Basic Information, Business Information, and Address about the customer. Before moving to the next step using the 'Next' button, you need to save the information by clicking the 'Save' button.

In this phase, you can add multiple delivery addresses. To add a delivery address, click on the 'Delivery Address' button located at the bottom right corner, which will open a pop-up.
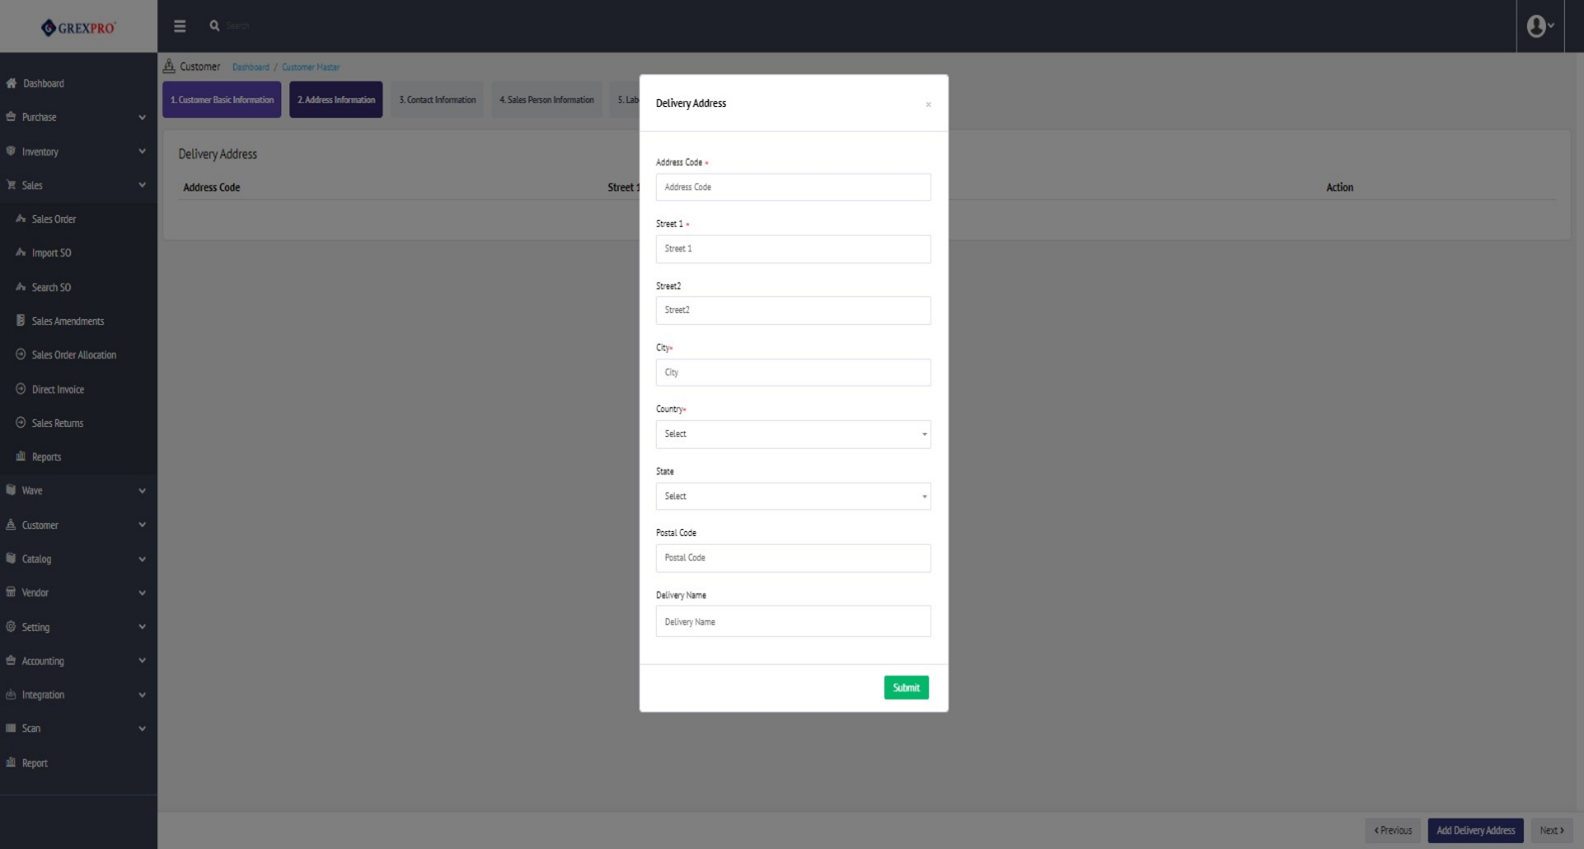
After adding the delivery addresses, you can go to the third step using the next button.
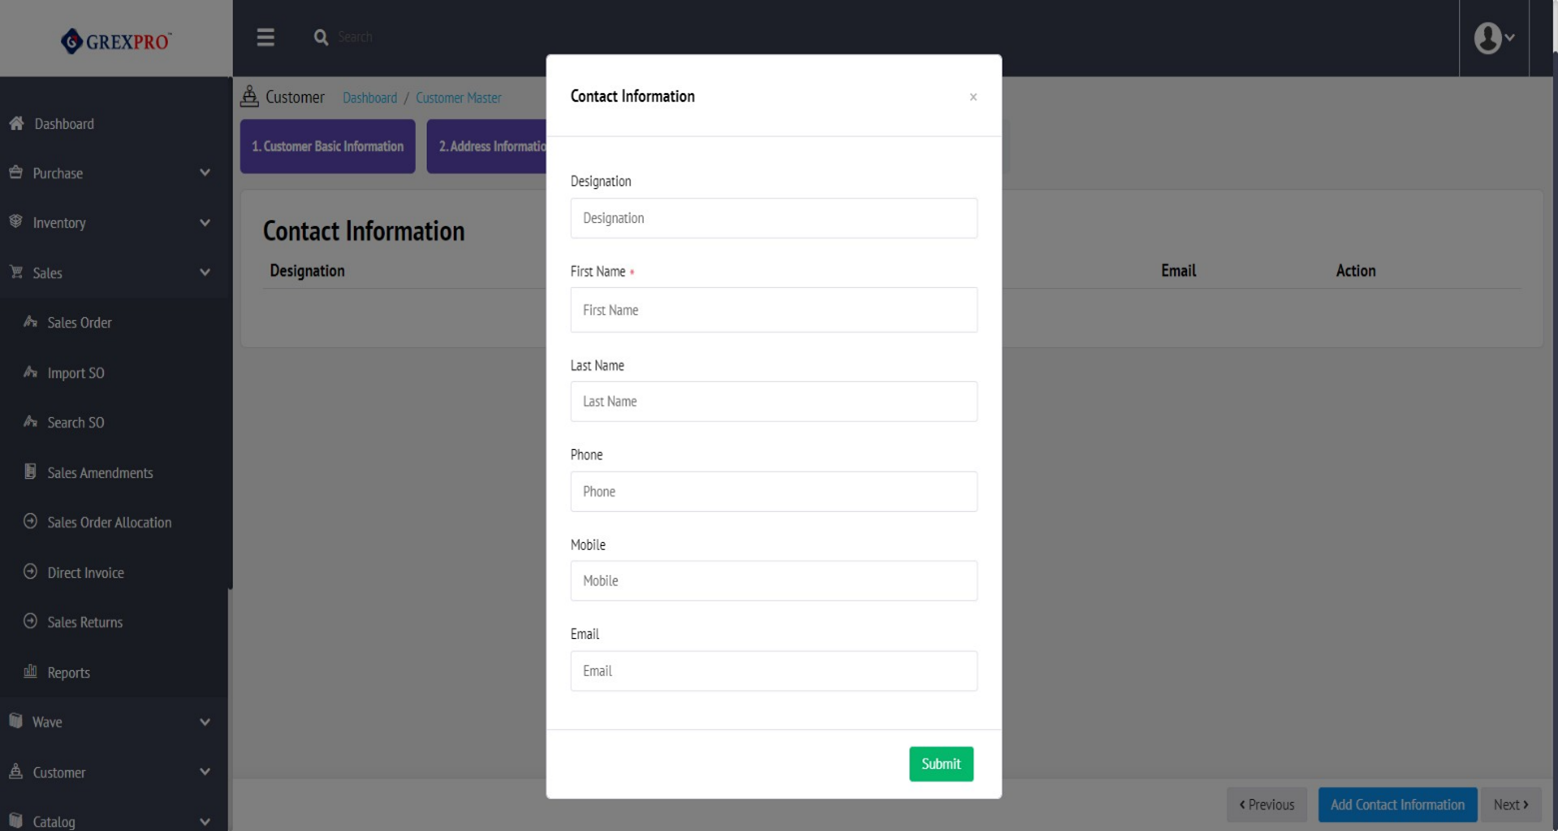
The third step allows you to add the contact information of customers. Simply click on the Add Contact Information button located at the bottom-right corner, which will open the following pop-up:
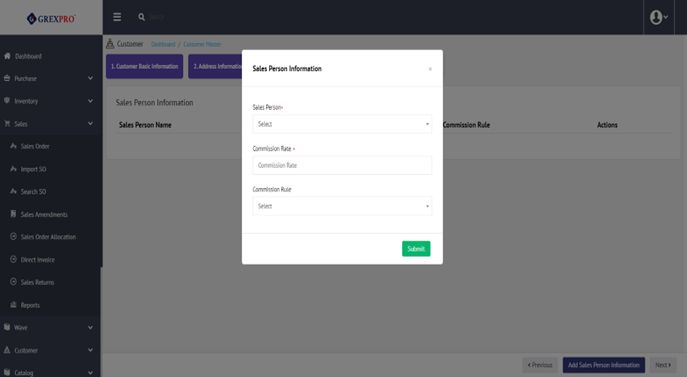
The next step is 'Salesperson Information' that facilitates you to add multiple salesperson along with their commission rates. You can click on the 'Add Salesperson Information' button located at the bottom-right corner of the screen, which will open the following pop-up:
Once done click the Next button, it will open the 'Label Mapping' page.
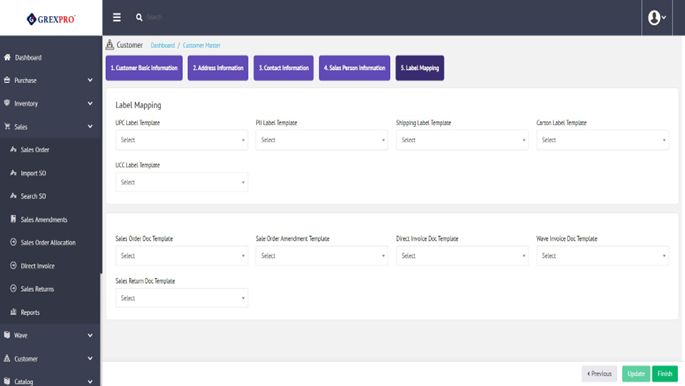
Provide details of label mapping, and to finish the customer addition process, you need to click the 'Finish' button located at the bottom-right corner of the screen.
As none of the Address Information, Contact Information, and Sales Person Information is mandatory, you can skip these steps and save the customer information in Customer Master.
You can edit and update information on existing customers by clicking the 'Customer Code' from the Customer Master List. Another way to edit customer information is by selecting a specific customer and clicking on the 'Action' button located at the top right corner of the screen. This will open a dropdown and you need to click the Edit option from the dropdown. After editing a customer information, you need to follow the same process as adding a customer.

To create a duplicate customer with a unique Customer Code, you need to select a customer and click on the 'Action' button located at the top right corner of the screen, where you will get the option of Clone. Clicking on Clone will create a duplicate customer.
You can only delete a customer entry for whom there are no details filled in the Address Information, Contact Information, and Sales Person Information sections. Once these details are filled, there won't be an option for Delete for that customer.
The system only allows you to change the 'Is Active' status of customers for whom there are no details filled in the Address Information, Contact Information, and Salesperson Information sections. Once these details are filled, there won't be an option for Inactive or Active.
Simply by clicking on the 'Import' button placed at the bottom centre of the page, you can import details of customers from the integrated website.
The Export button given at the bottom centre of the screen facilitates you to download a list of visible customers.
On this page, you can see a list of salespersons:

To add a new salesperson, you need to click the 'New' button, located at the top-right corner.
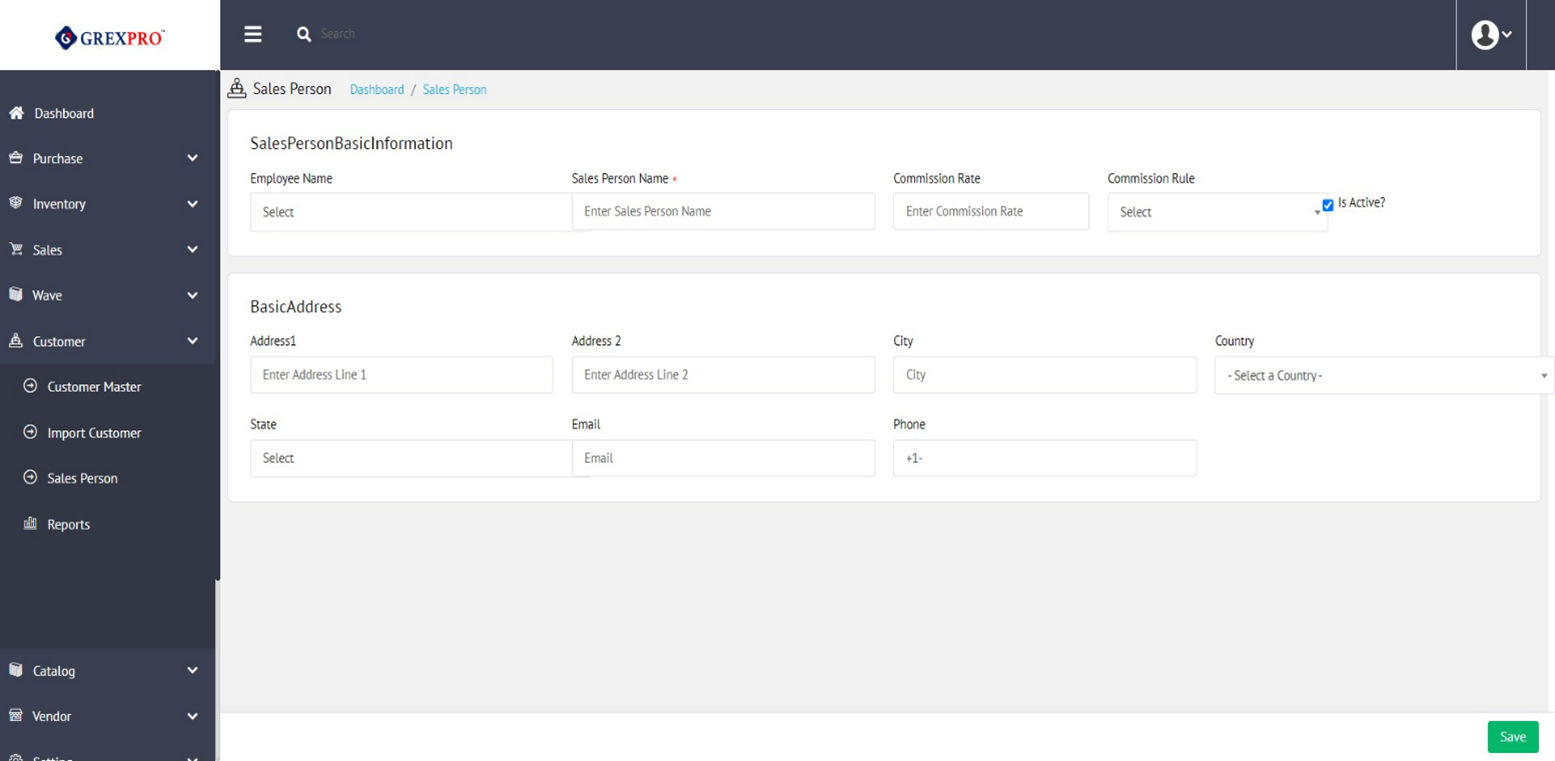
The form has basic fields including name, address, commission rule, email, phone, etc. However, a Salesperson Name is mandatory. You can also make an employee a salesperson by selecting the employee's name from the dropdown.
You can edit and update the information of an existing salesperson by clicking on 'Salesperson Name' from the Sales Person Master List. Another way to edit salesperson information is by selecting a specific customer, clicking the 'Action' button located at the top right corner of the screen, and clicking the Edit option from the dropdown. You need to follow the same process as adding a sales person.
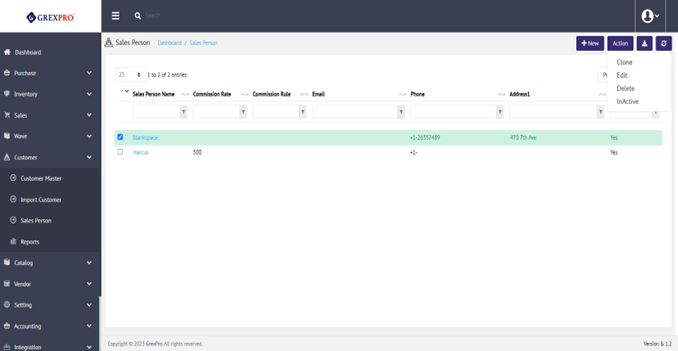
To clone the salesperson, you need to select an entry and click the 'Action' button located at the top right corner of the screen, where you will get an option of Clone. Clicking the Clone will open the form with existing details except the Salesperson Name. You need to fill in the required fields and click the 'Save' button.
The Delete option is only available for entries that are not linked to any other modules of the system. To delete an entry, you need to select an entry and click the 'Action' button located at the top right corner of the screen and click on the 'Delete' option from the dropdown.
The Active/Inactive option is only available for entries that are not linked to any other modules of the system. To change the status of an entry, you need to select an entry, click the 'Action' button located at the top right corner of the screen, and click on the 'Active/Inactive' option from the dropdown.
Import Customer is a feature by which a user can import Customer data into the Grexpro system from data saved into a CSV format file.
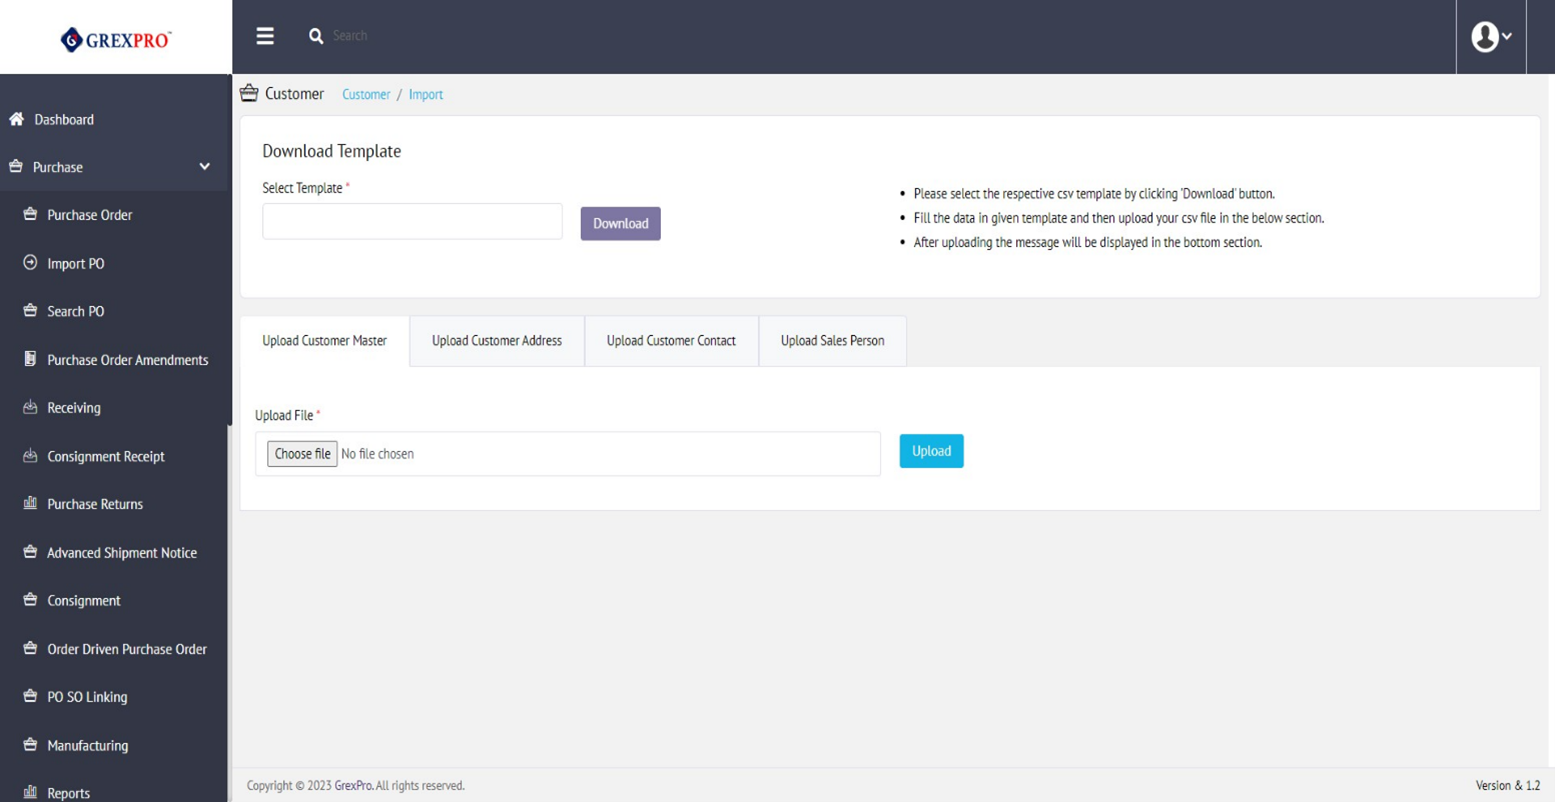
To import the data, the first user needs to download the template created for the process. To download the template for Customer, the user can select the template like Customer Master, Customer Address, Contacts & Salesperson, and then by using the "Download" button user can download the selected template(s).
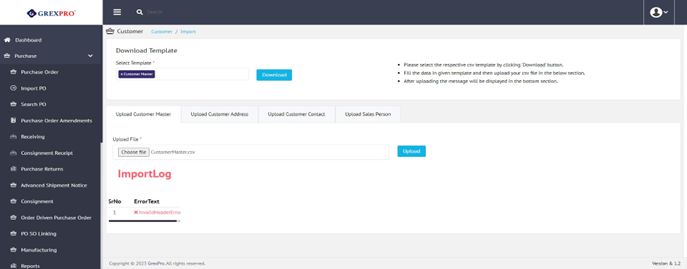
After downloading user needs to fill in the data in the given format and then try to upload the file by the "Choose file" option in the upload area. Once the file is chosen, the user can click the upload button, and then the data uploading process starts.
If an Error occurs in the validation or data syncing process during data integration, the log created is displayed in the Log section. Users can check each recorded error, and after correction, it can be uploaded again.
Logs displayed can be cleared by clicking the "Clear Log" button in the Upload section.
Similarly, Customer Address, Contacts, and Salesperson data can be uploaded into the system from CSV file.